Early February we released an exciting new feature that enables you to add telemetry logging to your application using Application Insights.
That blog post can be found here: https://powerapps.microsoft.com/en-us/blog/log-telemetry-for-your-apps-using-azure-application-insig...
This blog post is a walk through for getting that running specifically for creating a send a smile experience from your Power Apps. You can also find a video of this walk through here:
https://powerusers.microsoft.com/t5/Webinars-and-Video-Gallery/Using-Power-Apps-and-Application-Insi...
This blog post will offer a set of walk through steps to get this set up for your applications:
1. Log into your Azure Subscription.
While this walk through requires an Azure subscription, that subscription does not have to be in the same directory in your Power Apps tenant
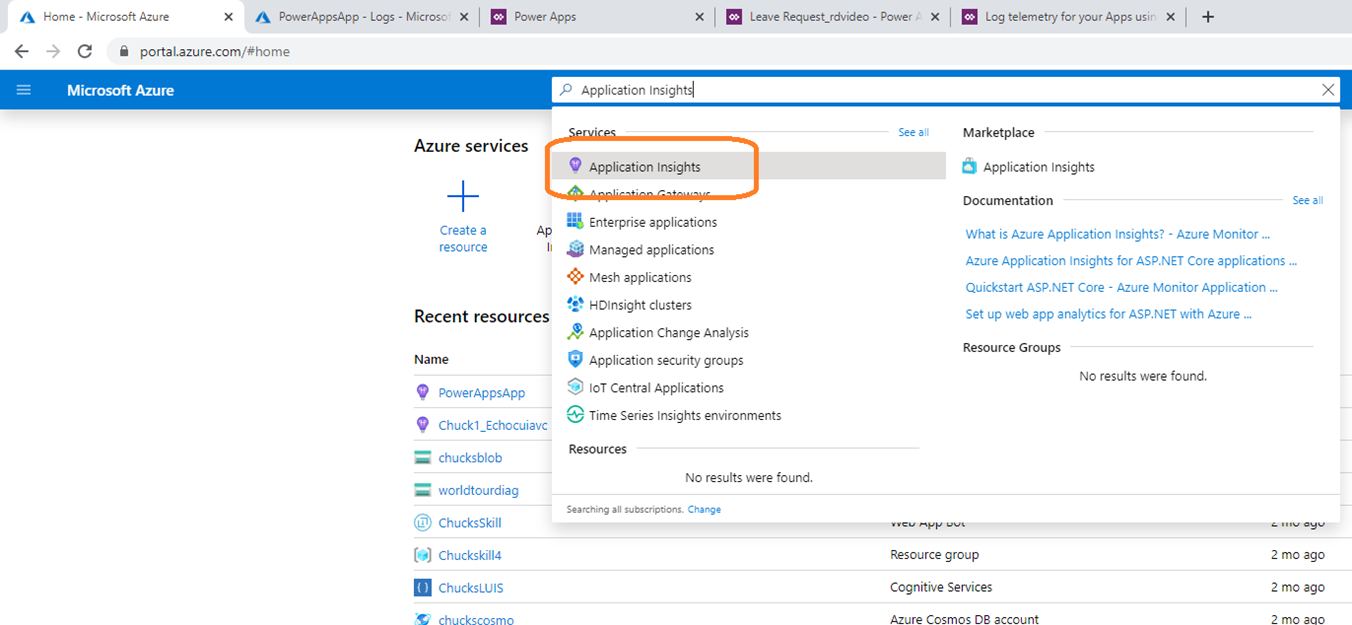
- Create an Application Insights resource
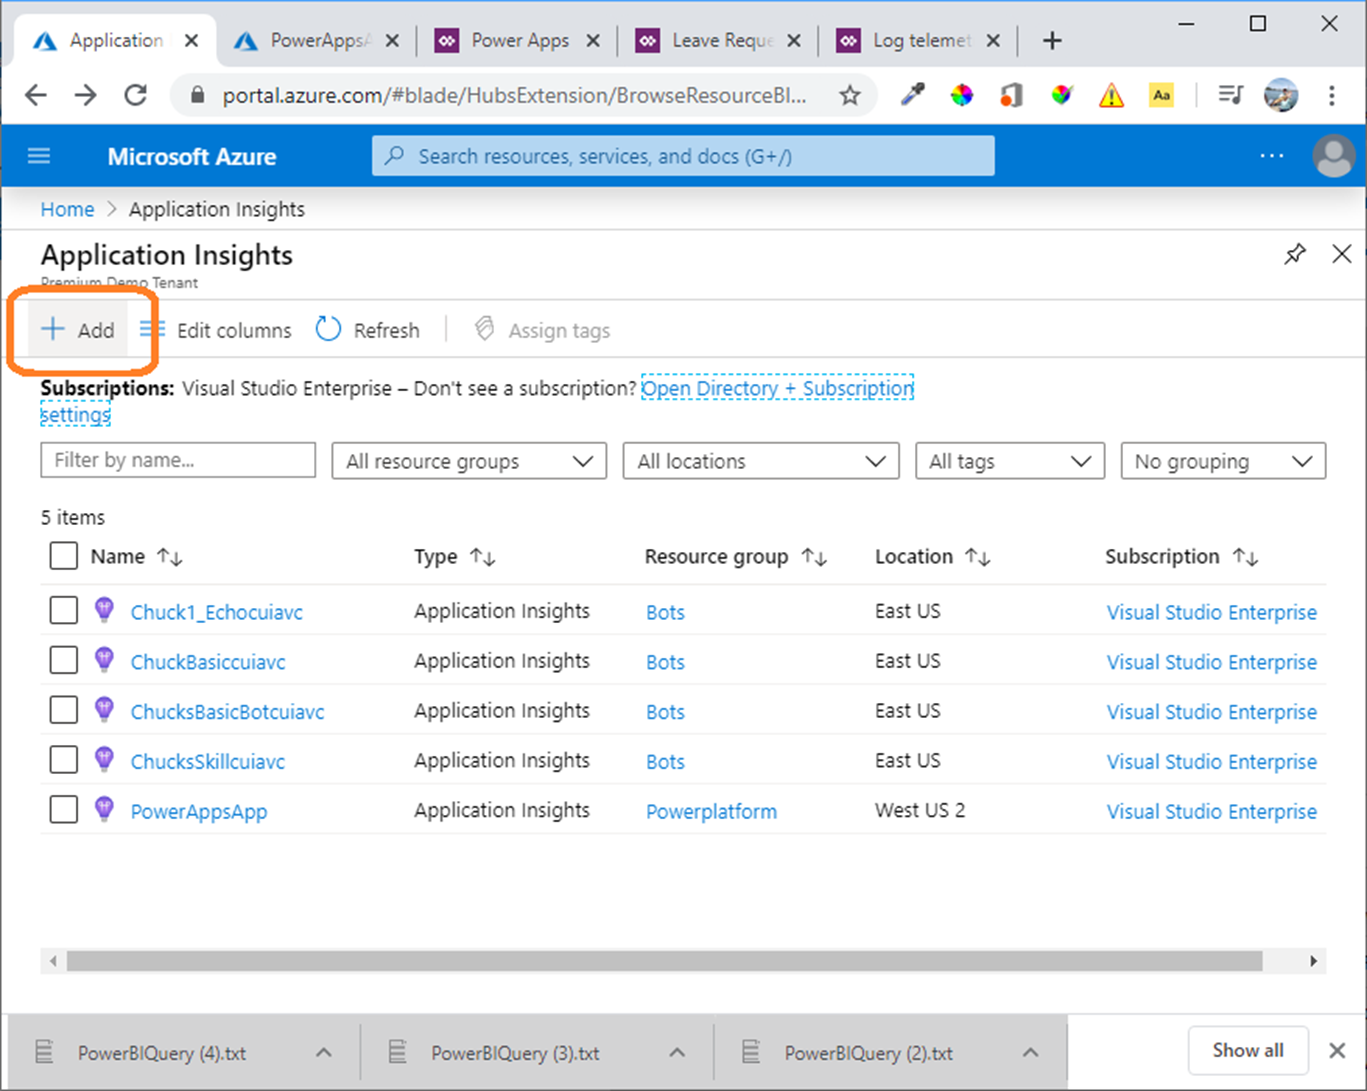 2. Name your resource instance. If you don't already have a resource group you can create one.
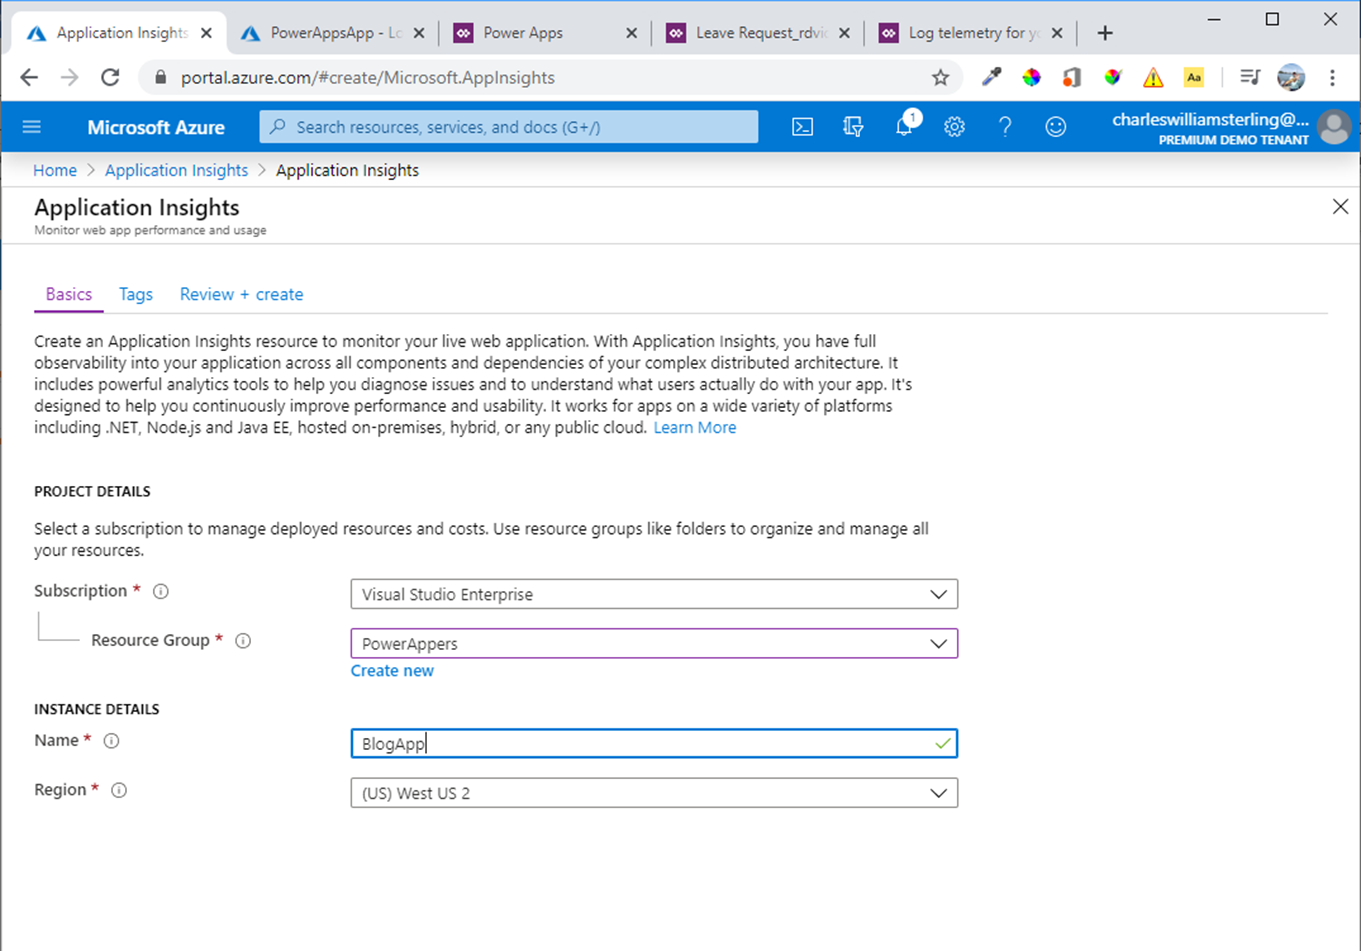
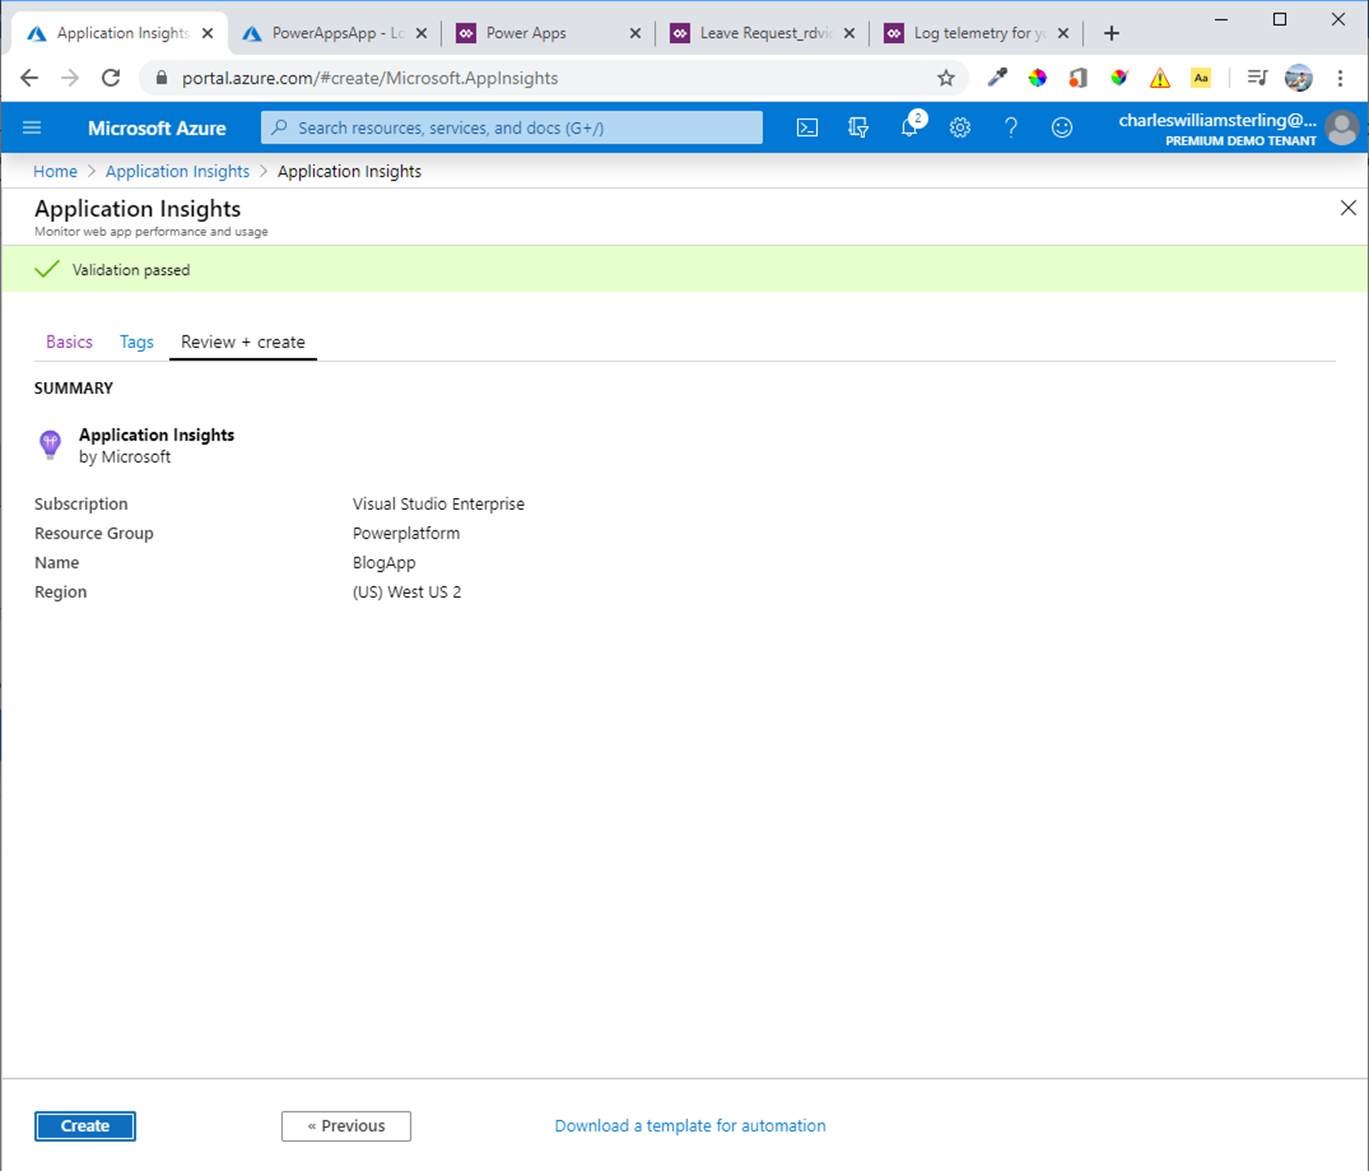
- Create the resource Instance
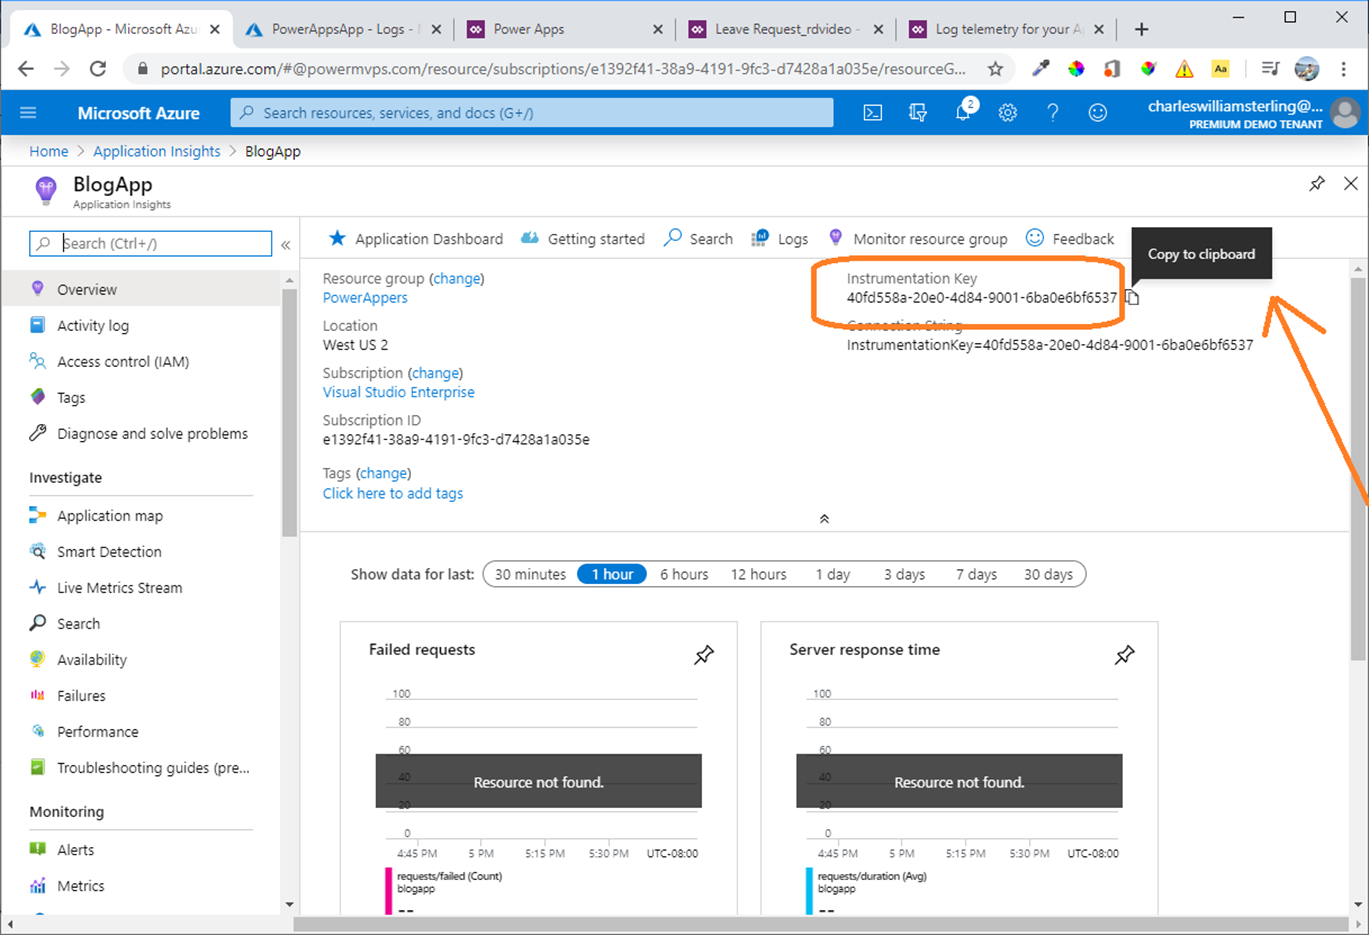
 3. Copy the instrumentation Key
 3. Create a new Power Apps application
 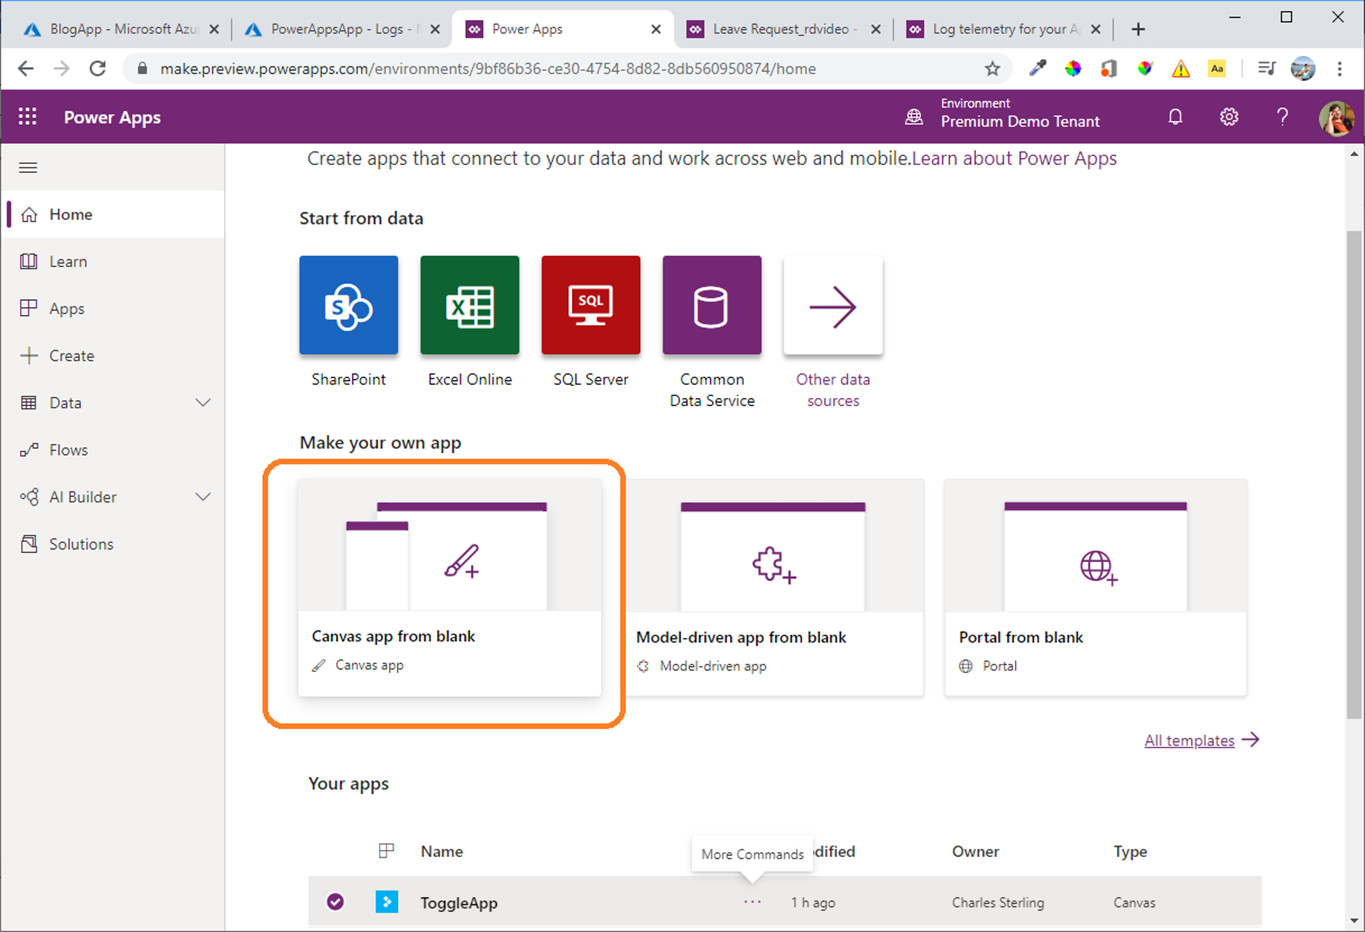 4. Set the Instrumentation key
  5. Navigate to Components
 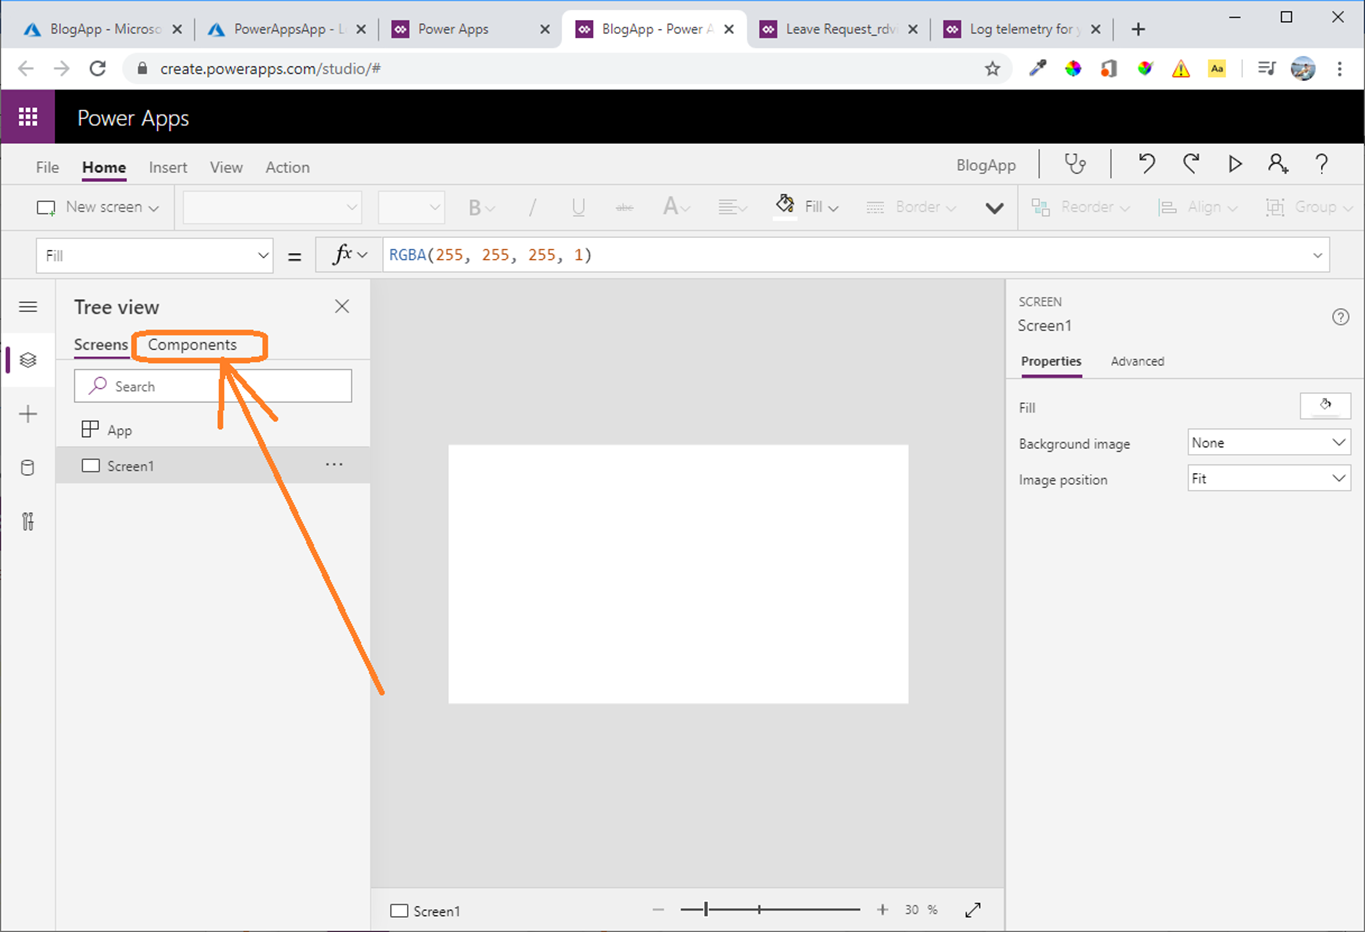 6. Create a new component
 7. Resize the component screen
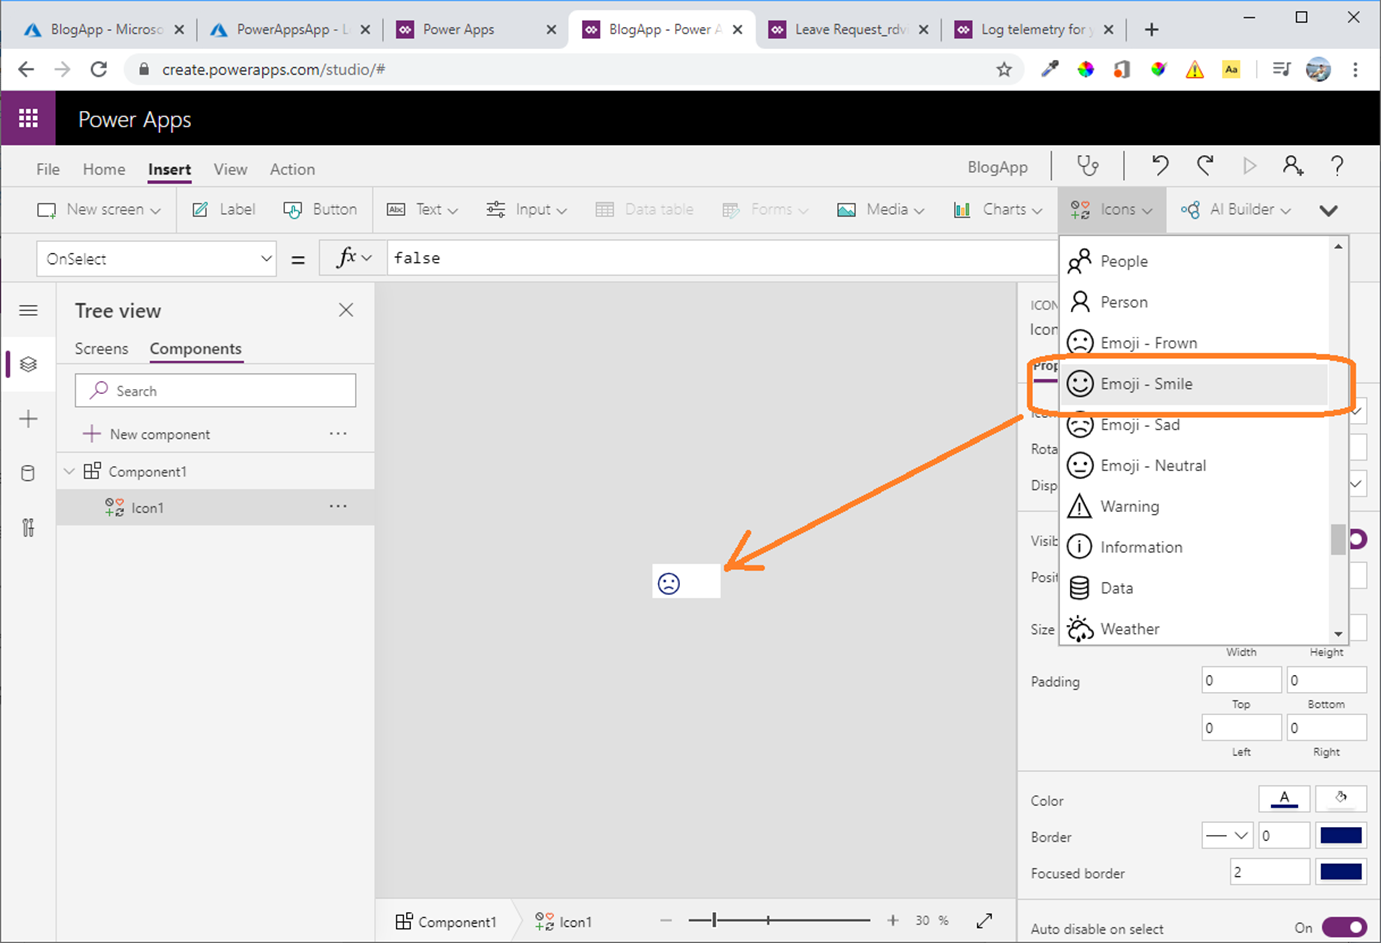
 8. Add a smile and frown Icon to the component.
 9. Select the frown icons and add the following code:
Trace("SendASmile", TraceSeverity.Information,{ChucksappName : "Blog App", Satvalue: "-1", AppUser: User().FullName })
 9. Select the smiley face and insert the following code in on the OnSelect event
Trace("SendASmile", TraceSeverity.Information,{ChucksappName : "Blog App", Satvalue: "1", AppUser: User().FullName }) 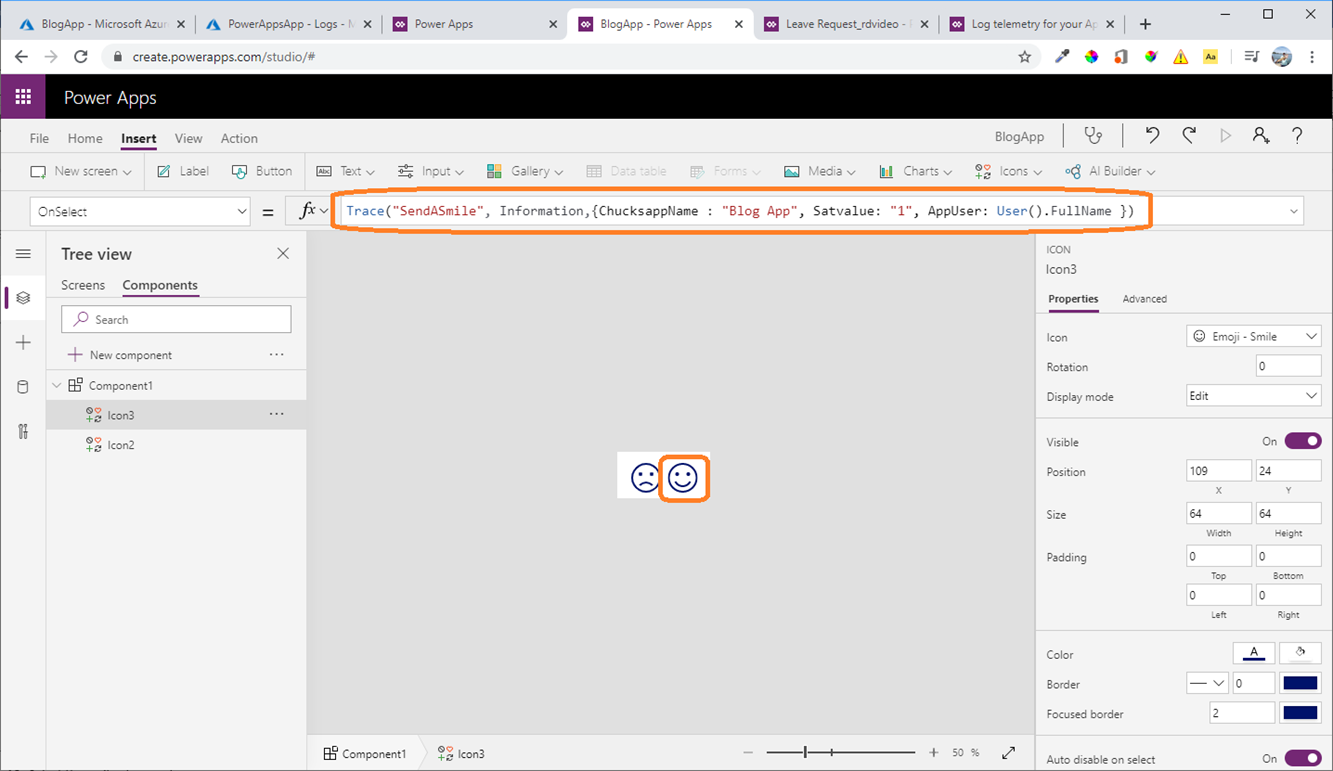 10. Rename the component. You can do this by double clicking or right clicking on the component name > Rename
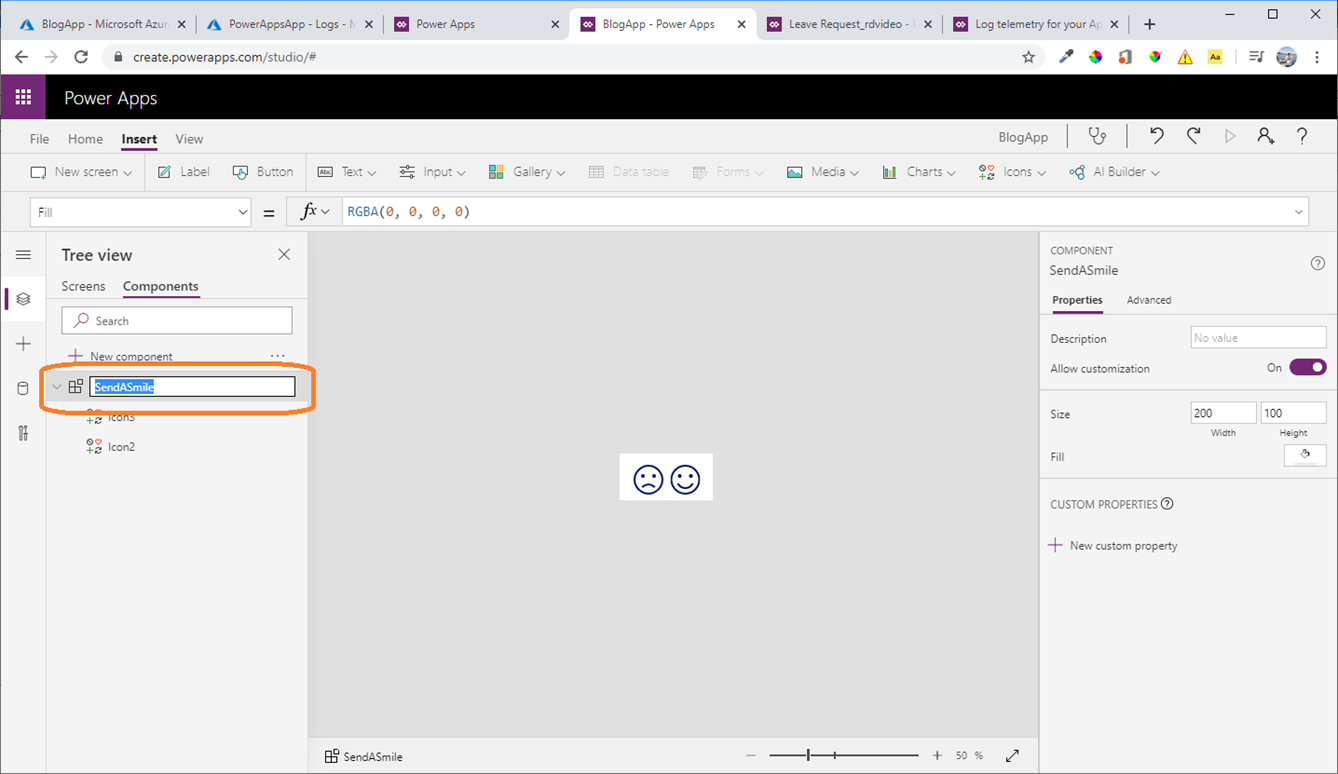
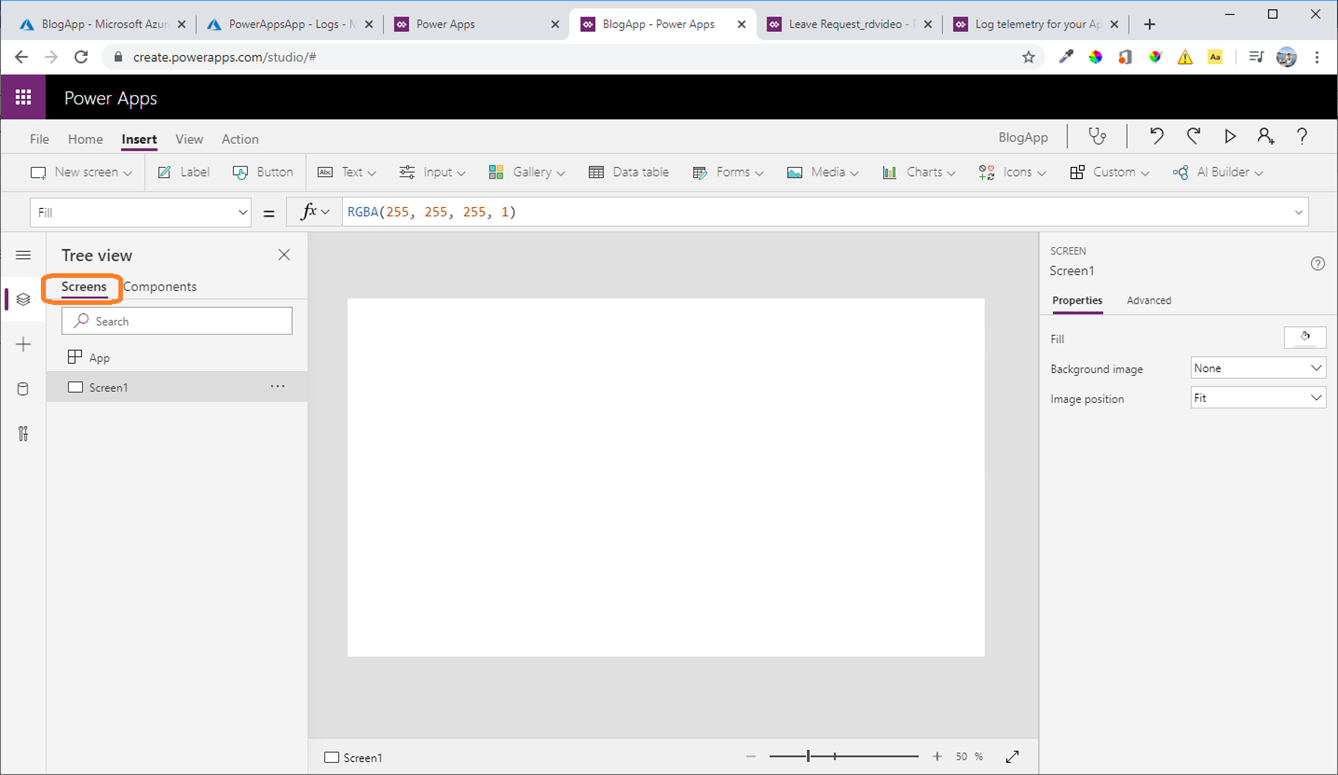
 11. Navigate back to Screens
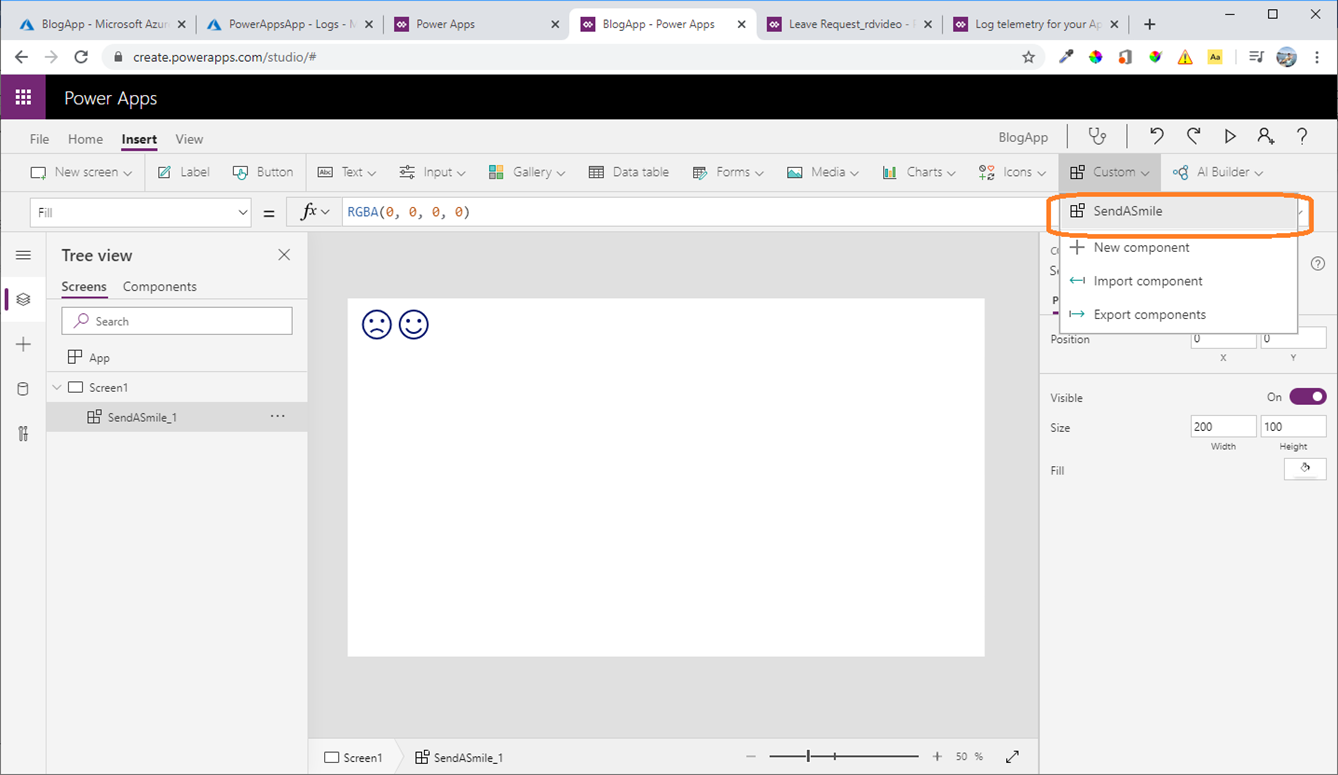
 12. Navigate to Custom and insert our component SendASmile
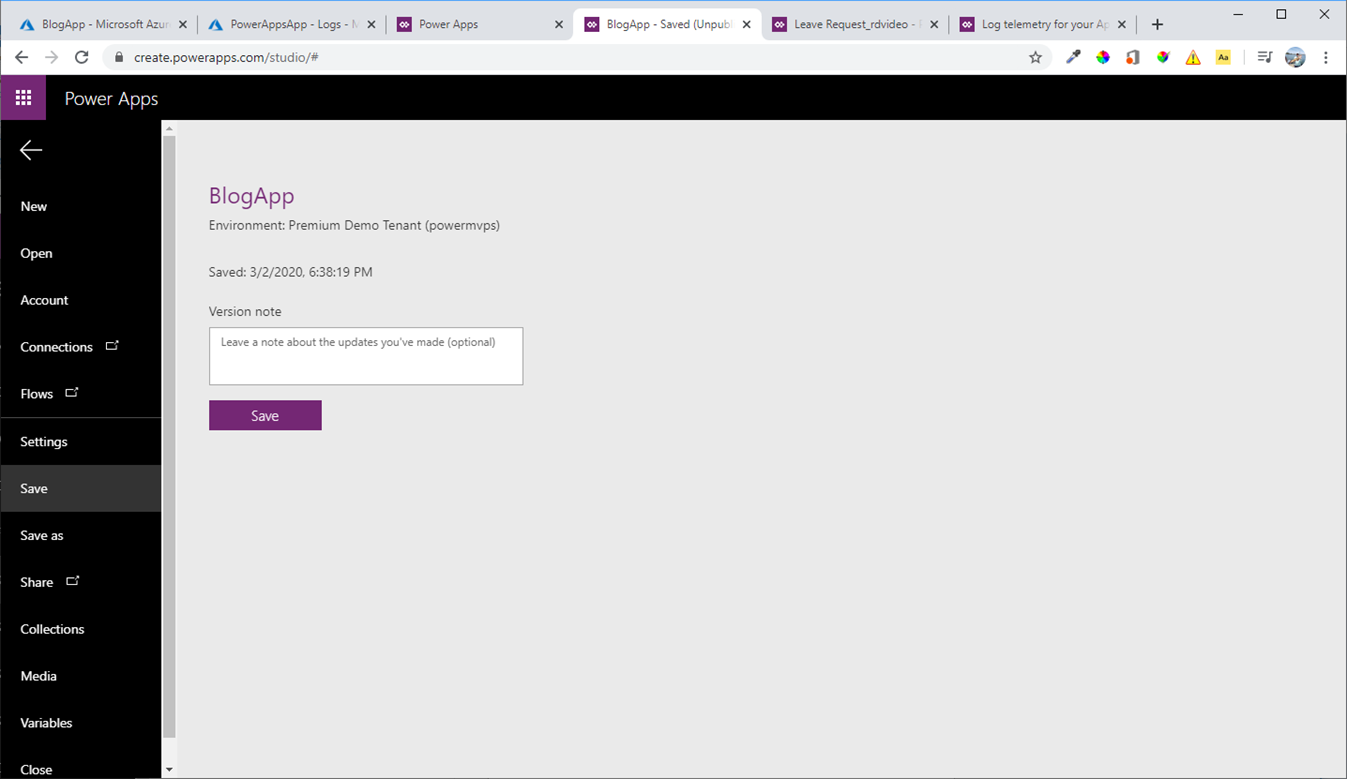
 13. Go to file Save and Save your application.
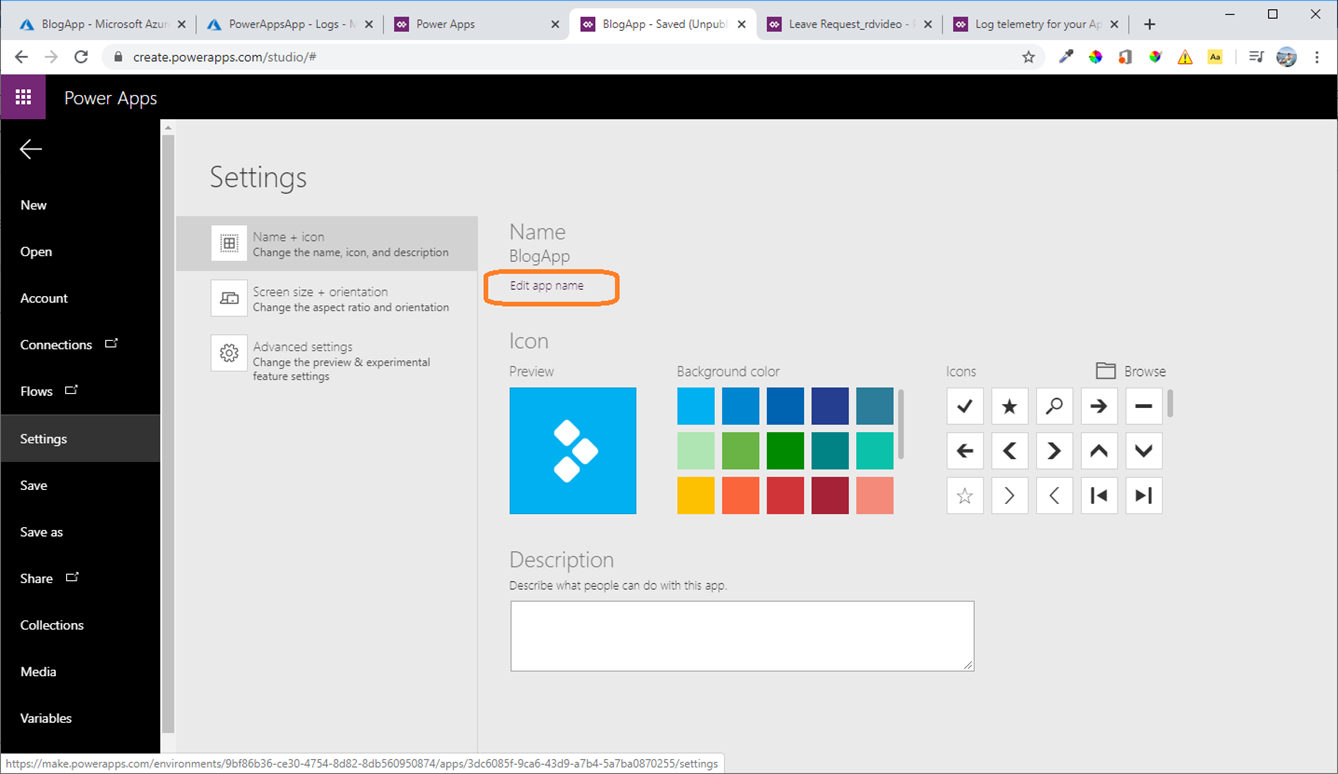
 14. To find the play URL. Navigate to File > Settings and select Edit App Name
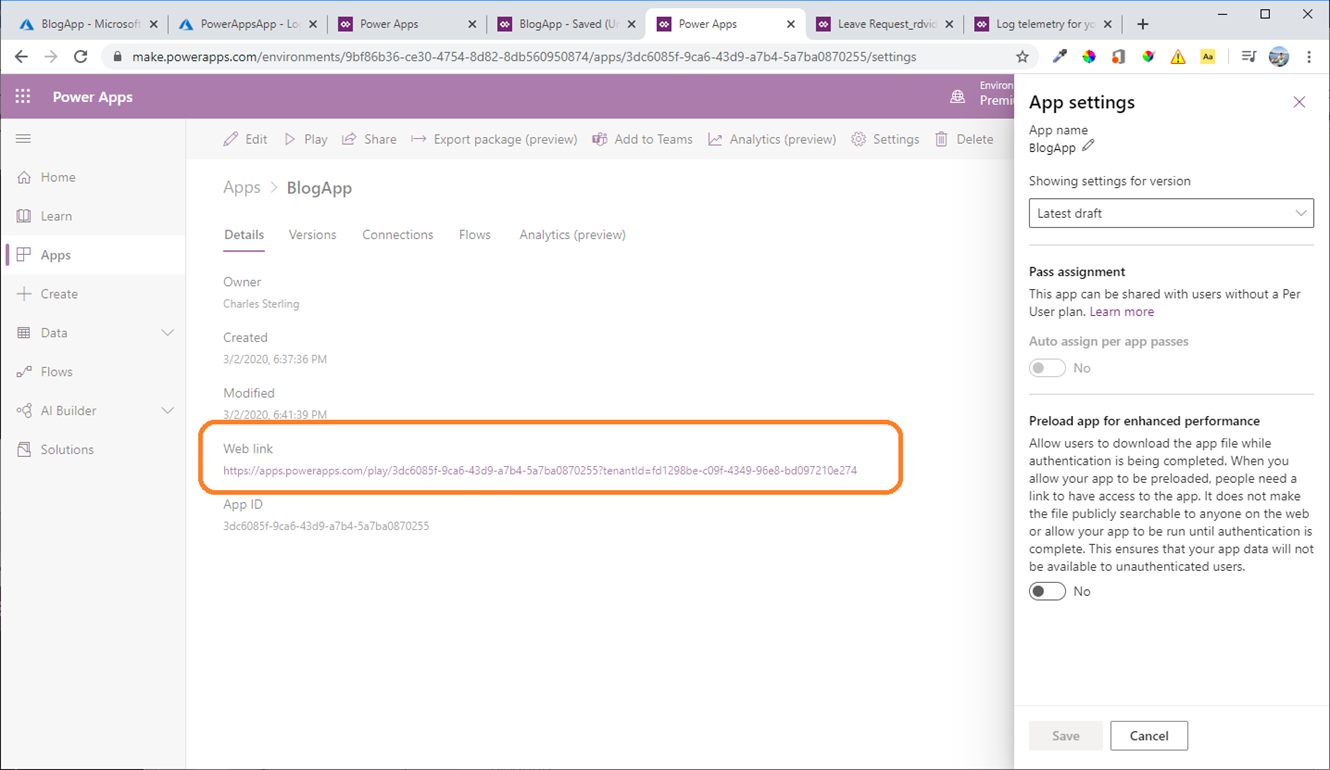
 15. Navigate to the Web Link. This is required as the telemetry is only collected in "play" mode rather than design mode.
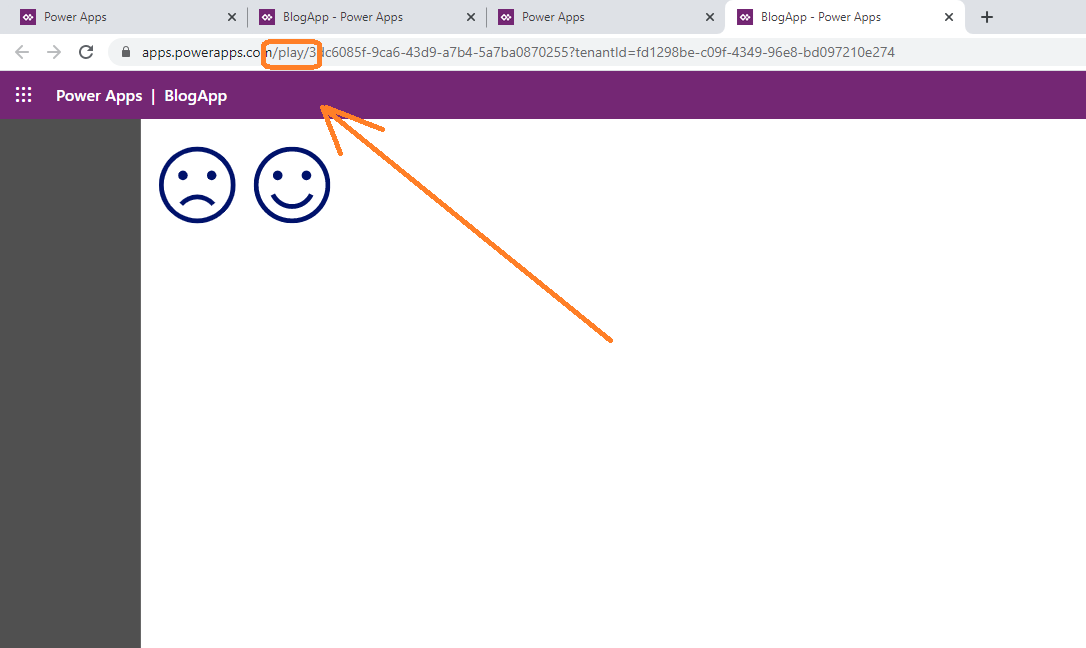
 16. Run the application and click on your icons a couple of times
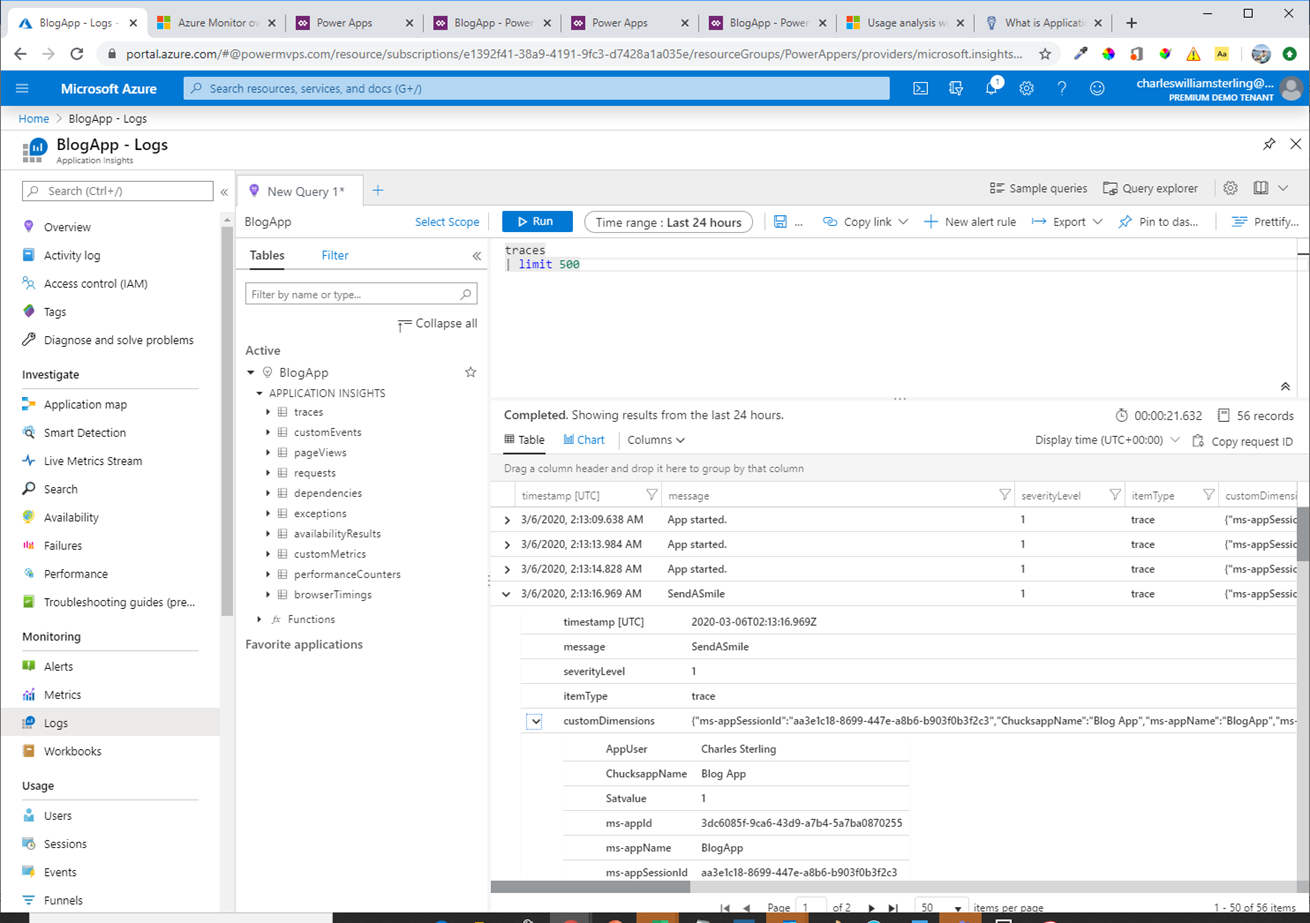
 17. Navigate back tot the Azure Portal and Application Insights.
In Application Insights choose the application you create 
- In about 5 minutes you should be able to see your telemetry start coming through.
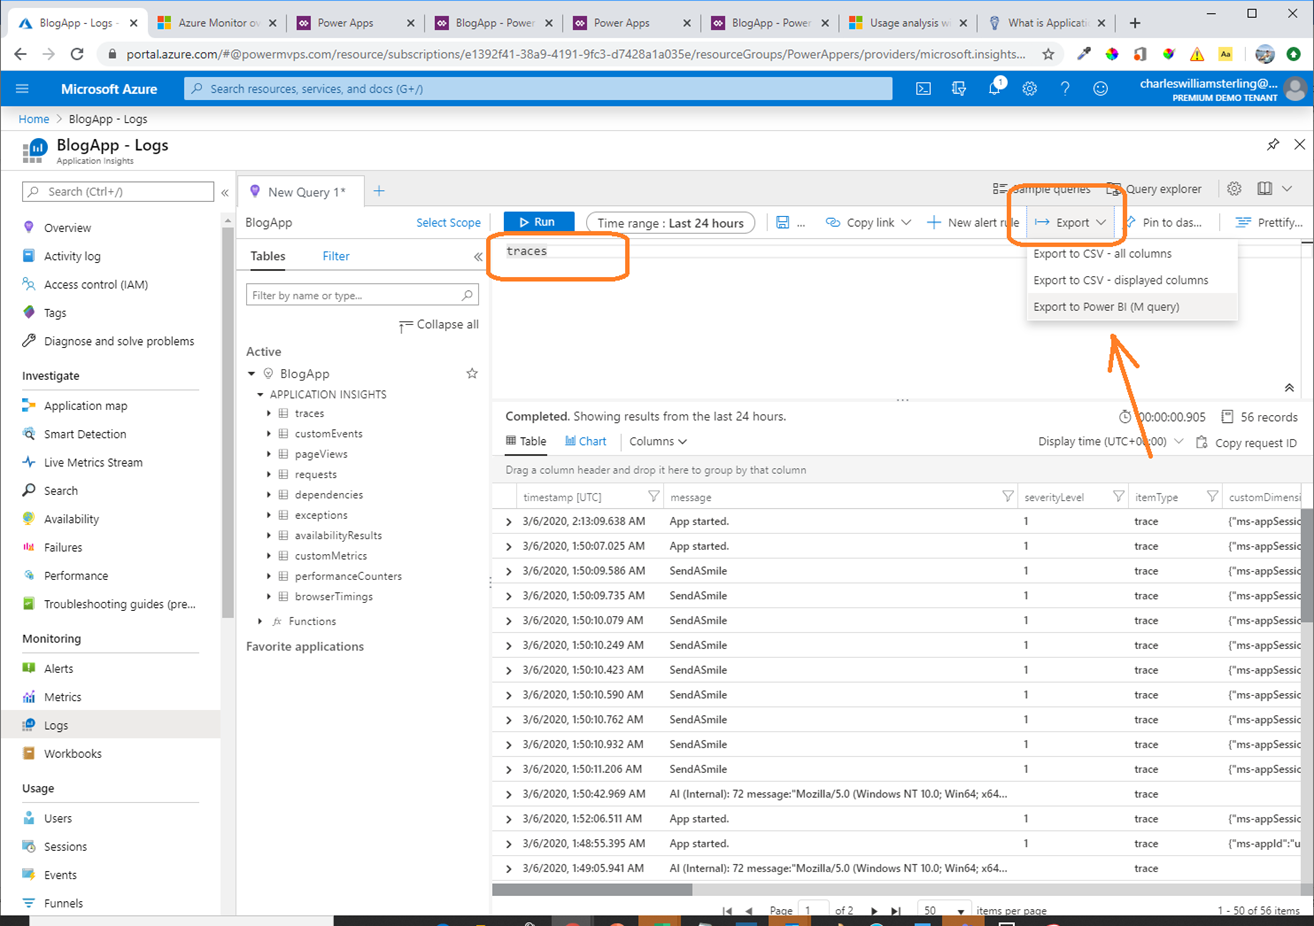
Exporting your Application Insights resource data to Power BI
Now that you have your Power Apps application connected to Application Insights you can configure Power BI to automatically import log data from Azure Monitor to take advantage of these additional visualizations.
- In your query window remove the limit line so the entire query is simply "traces". Select Export > Export to Power BI. This will export the M Query that you can use in Power BI desktop.
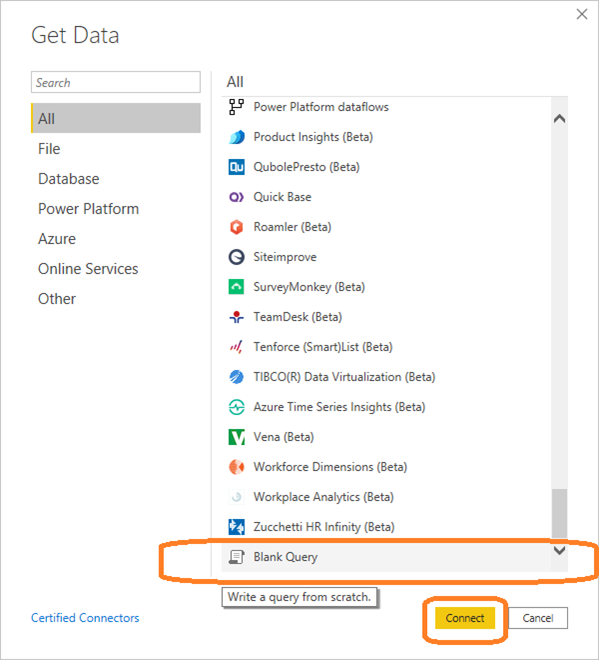
 2. Open Power BI Desktop. Select Get Data > Blank Query > Connect
 3. In the Power Query Editor, select the Advanced Editor option. In the advanced editor erase the default query and paste in the query downloaded from the Export step above.
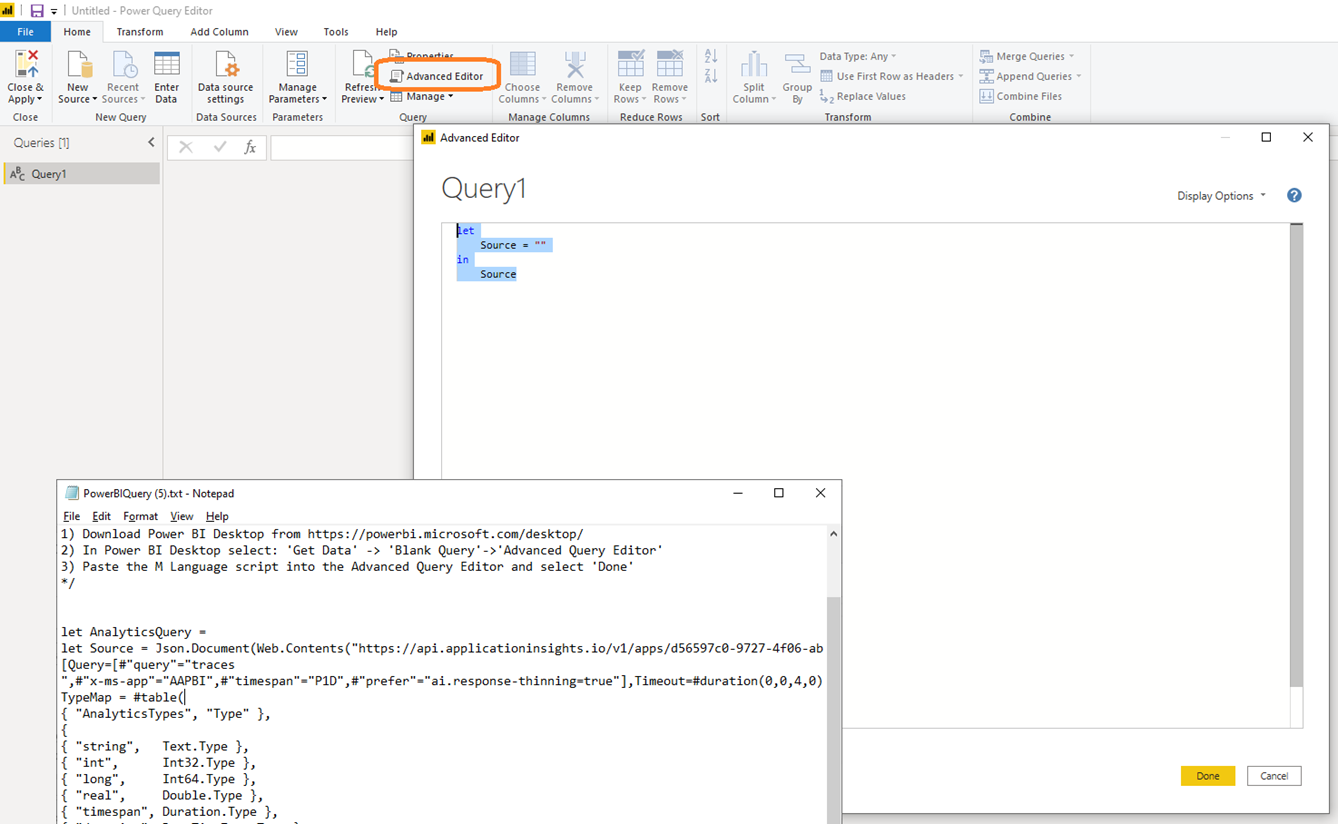 4. Here is an image of this in a completed state. Select "Done"
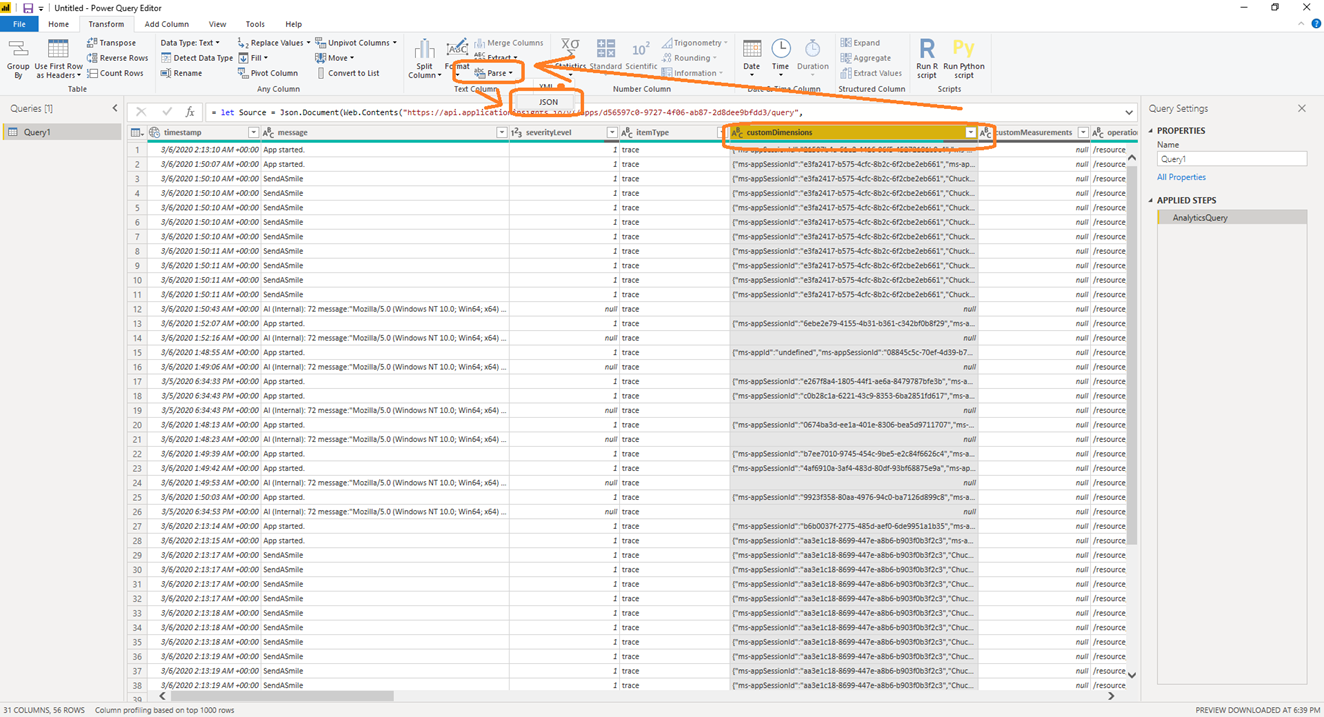
 5. Transform the customDimensions column to JSON
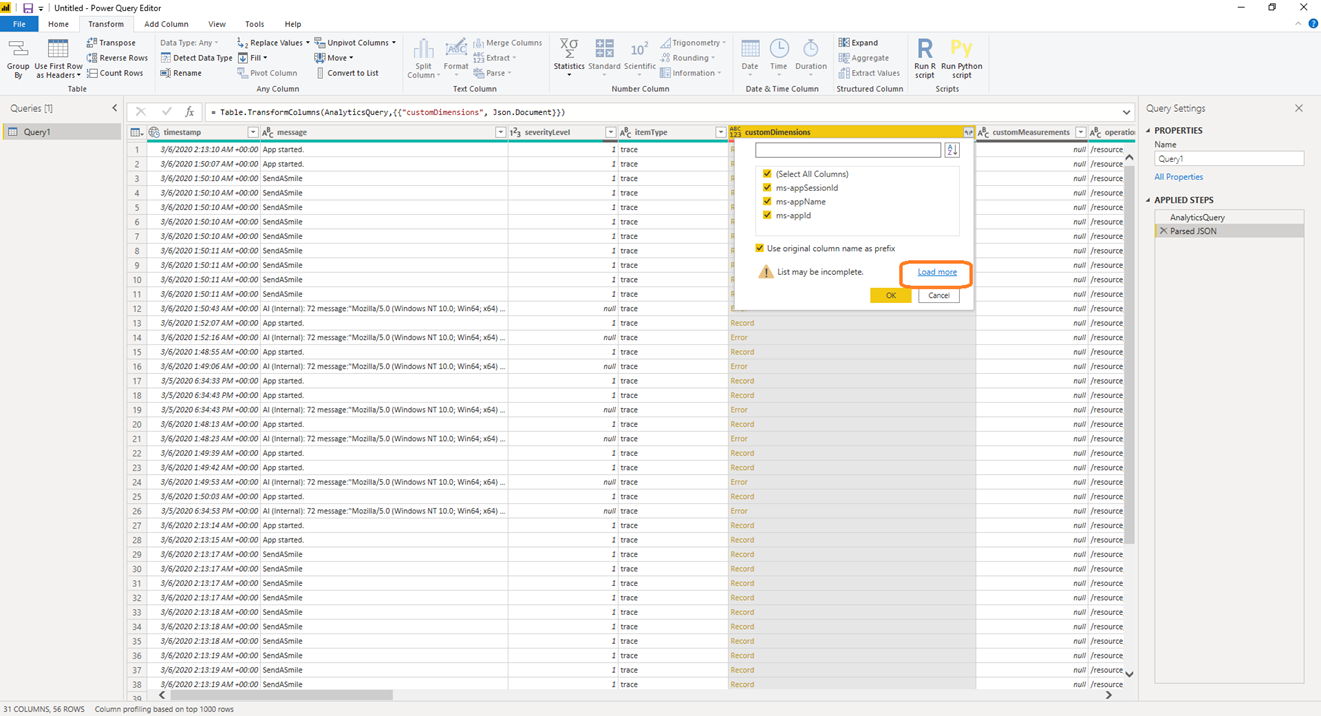
 6. Select the customDeminsions and click "Load More" to see all the values.
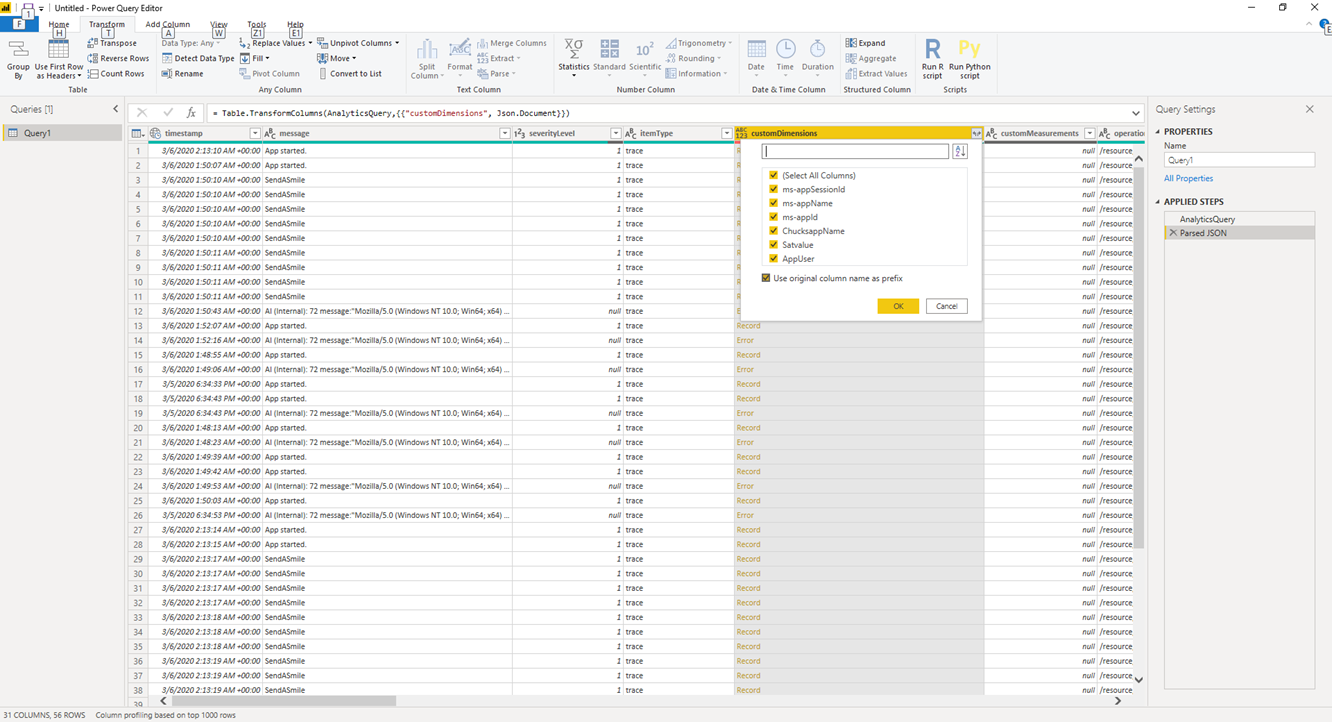
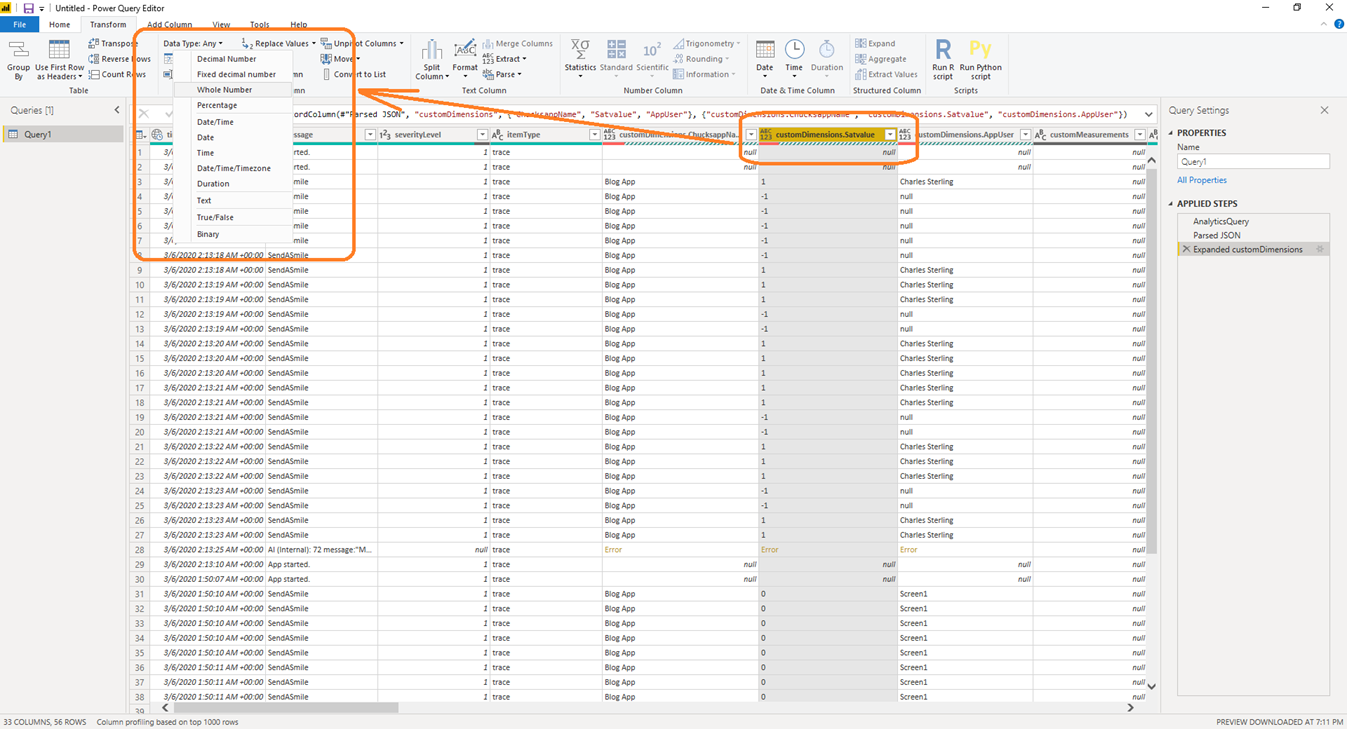
 7. Select the customDeminsions column and select the columns you are interested in.
 7. Remove Errors. As we expanded a column that doesn't have all the values there will be errors in the dataset. If you do not remove these error you will get the falling error when you apply the changes:
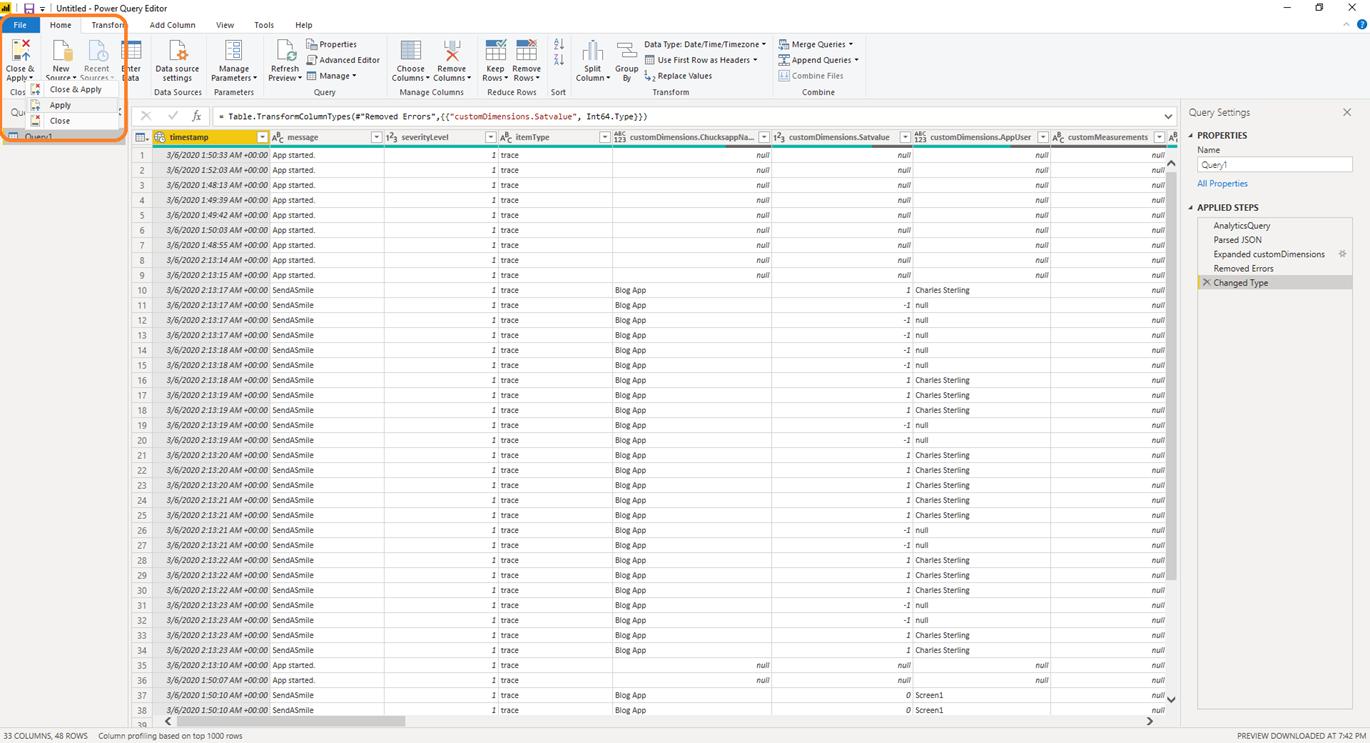
Failed to save modifications to the server. Error returned: 'OLE DB or ODBC error: [Expression.Error] The parameter is expected to be of type Text.Type or Binary.Type.. ' 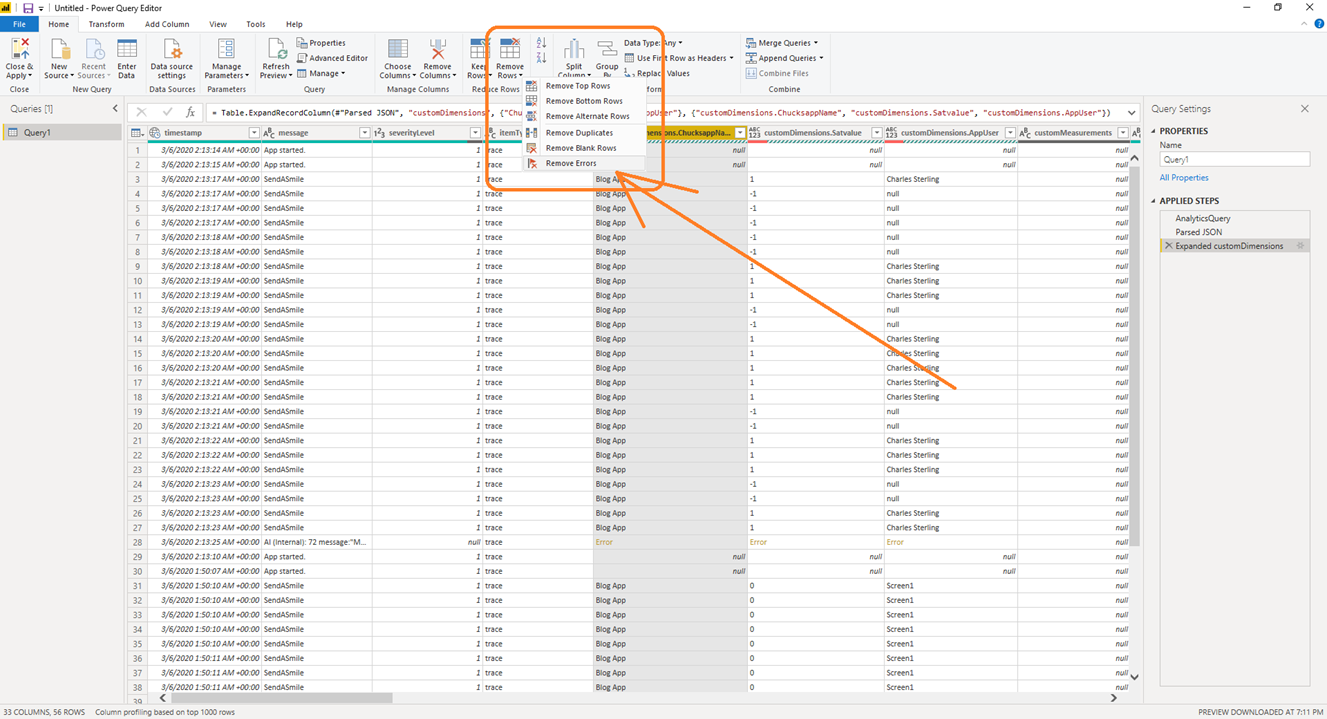 8. Change the data type of our SatValuue to whole number. Note: In later releases you will be able to pass in numbers from Power Apps and this step won't be needed. NOTE: Trace also allows you to send in objects like App.Screen this will not work. The text needs to be send i.e. App.Screen.Name
 9. Select Close and Apply. Note if you get errors from other columns you can either ignore them remove them by repeating the remove error step as shown above for the other columns.
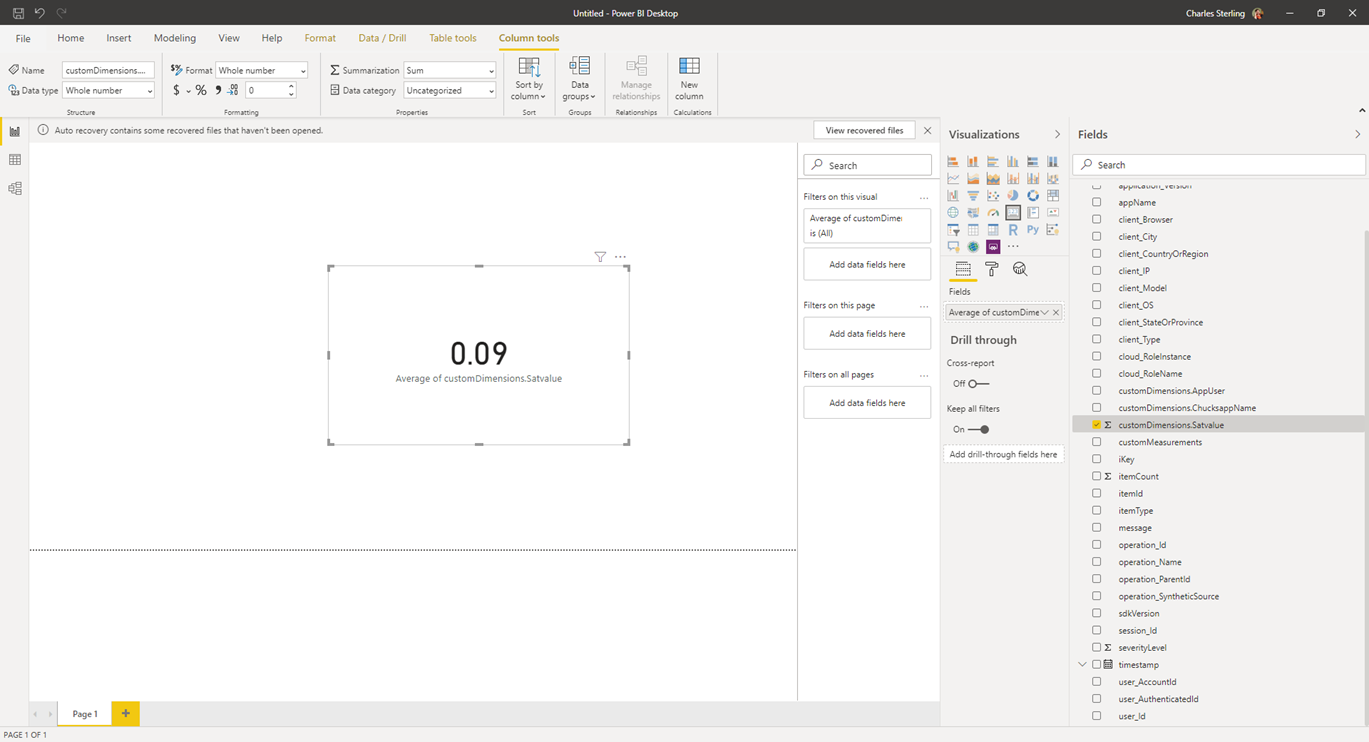
 10. You can now work with this dataset as any other Power BI Dataset….In this case a card is displaying the average Satvalue. Note since this dynamically retrieving data from Application Insights you would likely want to use a DataFlow to persist the data over time.
Big shout out to @seadude who spent his Saturday walking the entire PowerAppers User Group through getting this setup on our computer! https://www.meetup.com/Seattle-PowerAppers/
 ManishM
on:
How do you bulk download attachment files from a D...
ManishM
on:
How do you bulk download attachment files from a D...
 on:
What you should know when recruiting for a Power P...
on:
What you should know when recruiting for a Power P...
 on:
Introduction of AI Builder in Power Automate: How ...
on:
Introduction of AI Builder in Power Automate: How ...
 on:
Top-down 2D game engine proof of concept
on:
Top-down 2D game engine proof of concept
 WarrenBelz
on:
Locking down SharePoint so only Integrated App can...
WarrenBelz
on:
Locking down SharePoint so only Integrated App can...