Power BI Dashboard
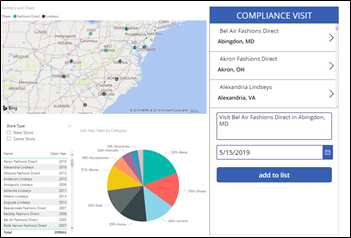
In this lab, you will create a Power BI dashboard with an embedded PowerApp. The final product will look like the image below.

Exercise 1: Build Power BI Report
High level tasks
Task 1: Connect to PowerBI and enable sample data. Build PowerBI report
Task 2: Import PowerApp visual for use in report
Task 1: Build Report
In this task, you will build the Power BI Report.
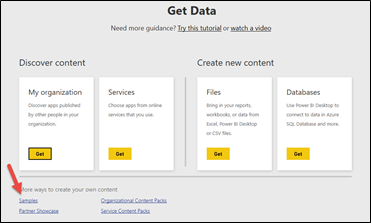
- Navigate to https://powerbi.microsoft.com and click Sign in.
- At the bottom of the left navigation, click Get Data
- Select Samples.
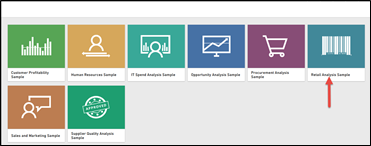
- Select the Retail Analysis Sample.
- Connect.
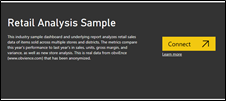
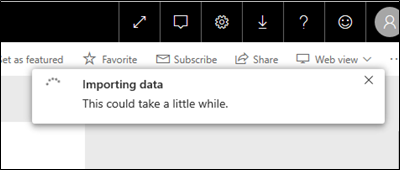
- Your sample dataset will take a moment to load.
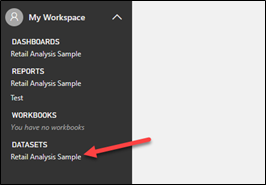
- Expand My Workspace and click to on the Retail Analysis Sample under the Datasets. If you have completed the prior steps and do not see this sample, refresh your browser.
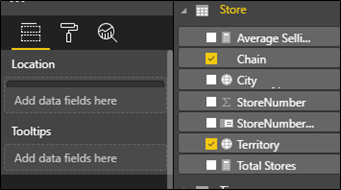
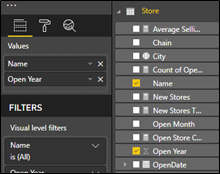
- Go to the Fields pane, expand the Store table, and select the Territory and Chain fields. Be sure to select the Territory field first or the designer will add table visual to the canvas, instead of map visual. You can also add the map visual to the canvas first and then select the fields in any order.
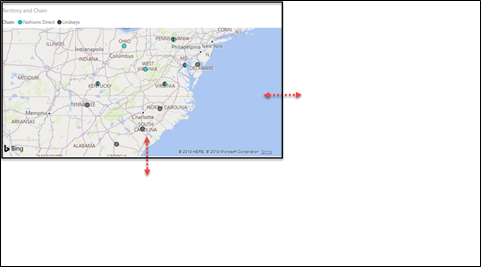
- The map visual will be added for you. Resize and reposition the map as shown below.
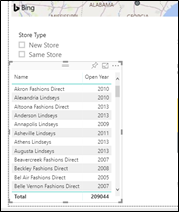
- Select the canvas and click Slicer visual.
- With Slicer selected, go to the Store table and select the Store Type field.
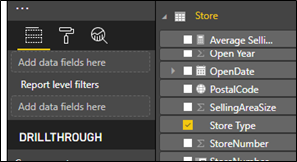
- Resize and reposition the Slicer as shown below.

- Select the canvas, go to the Store table and select the Name and Open Year fields.
- The table will be added for you. Resize and reposition the table as shown below.
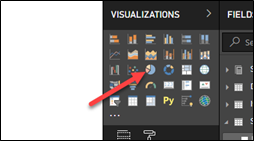
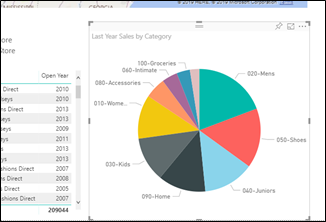
- Select the canvas and click on the Pie Chart visual.
- With the Pie Chart selected, expand the Sales table and drag Last Year Sales filed to Values.
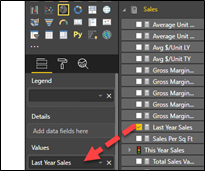
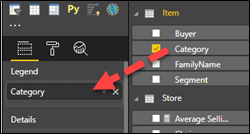
- With the Pie Chart still selected, expand the Item table and drag Category field to Legend.
- Resize and reposition the Pie Chart visual as shown below.
Task 2: Import PowerApps Custom Visual
In this task, you will import PowerApps custom visual.
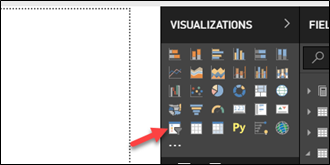
- Go to the Visualization pane and click Import from Marketplace.
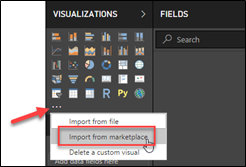
- Search for PowerApps and click Add.
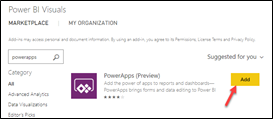
- You should now have the PowerApps visual available for you to use.
Exercise 2: PowerApps Visual
High level tasks
Task 1: Create the canvas app you will use as a visual
Task 1: Create PowerApp Visual
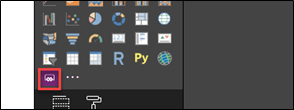
- Click on the PowerApps Visual.
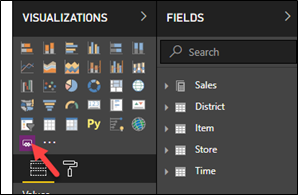
- With the PowerApps visual selected, expand the Store table and select City and Name.
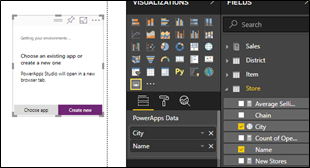
- Click on the environment name and select the environment you want to create the PowerApp in.
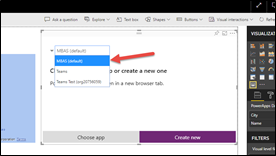
- Click Create New.
- PowerApps studio will open in a new browser tab and Gallery will be added to screen.
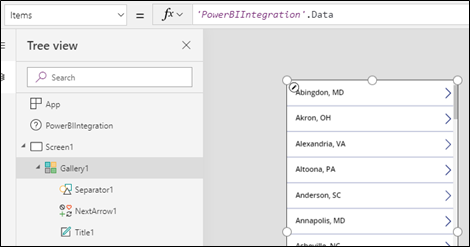
- Resize Gallery1 it until it looks like the image below.
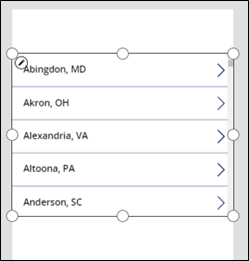
- Click on the Edit button. The gallery will go into edit mode.
- Resize the item template of the gallery and make it slightly taller.
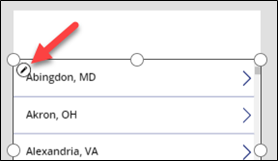
- With the gallery still in edit mode, select the Insert tab and click Label.
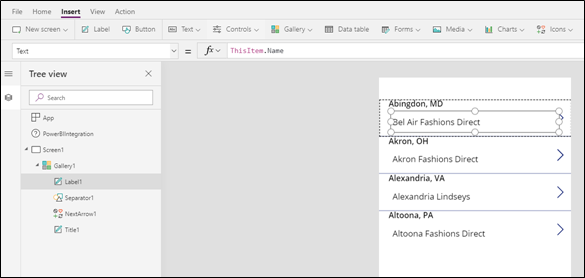
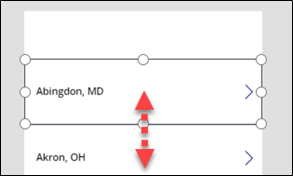
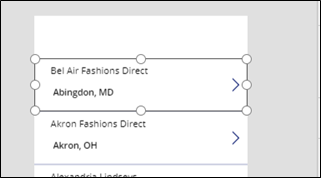
- Reorder the labels as shown in the image below.
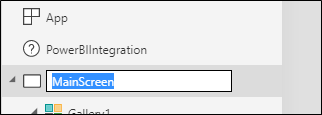
- Double click on Screen1 and rename it MainScreen.
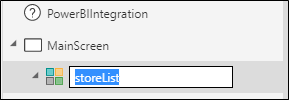
- Double click on Gallery1 and rename it storeList.
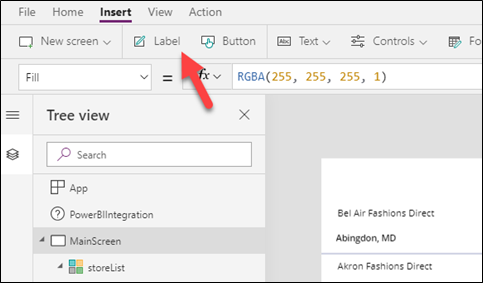
- Select MainScreen and click insert Label.
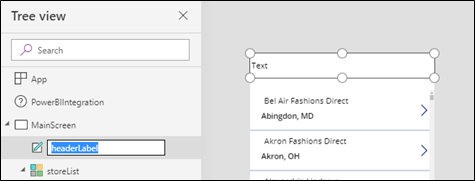
- Rename the new label headerLabel, move to the top of the screen and resize it.
- Change the Text for the headerLabel to COMPLIANCE VISIT.
- Select the Home tab.
- Select the headerLabel, change the font Size to 32,
Color to White, Fill to Blue, and click Align.
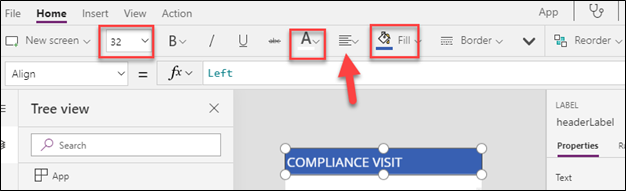
- Select Center.
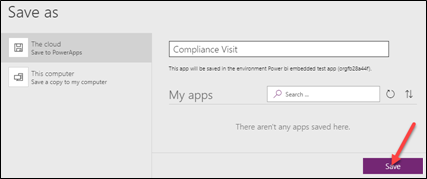
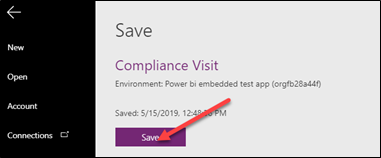
- Click File and click Save.
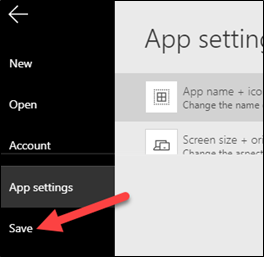
- Enter Compliance Visit for Name and click Save.
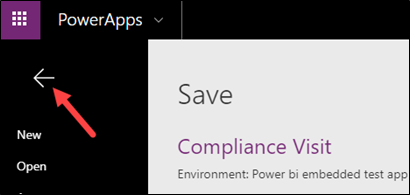
- Click on the PowerApps back button (not the browser back button).
Exercise 3: Connect to Microsoft To-Do
High level tasks
Task 1: Add connector to Microsoft To-Do
Task 2: Save and test your work
Task 1: Add Microsoft To-Do Connector
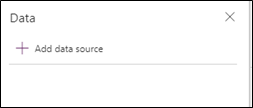
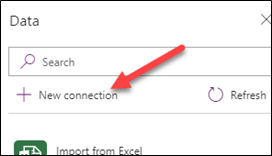
- While still in the app designer, select the View tab and click Data Sources.
- Click Add New Source.
- Click New Connection.
- Search for Microsoft To-Do and select it.
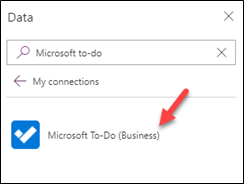
- Click Create.
- Close the Data pane.
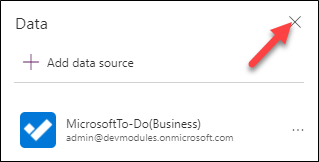
- Select the MainScreen.
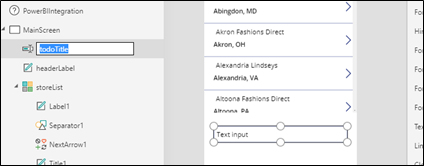
- Select the Insert tab, click Text and select Text Input.
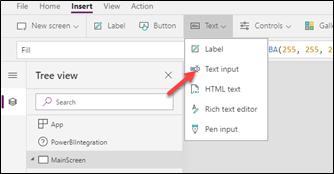
- Rename the new text input todoTitle and place it below the storeList.
- Change the Default value to the formula below.
Concatenate(“Visit “, storeList.Selected.Name, ” in “, storeList.Selected.City)
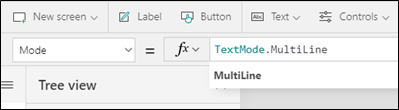
- Change the Mode to MultiLine.
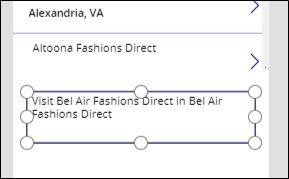
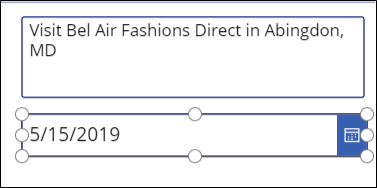
- Resize todoTile and make sure it looks like the image below.
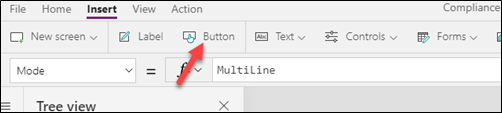
- Select the Insert tab, click Controls and select Date Picker.
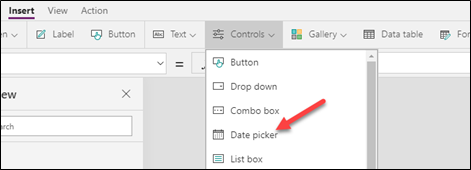
- Rename the Date Picker dueDate.
- Place the dueDate control below the todoTitle control.
- Select the Insert tab and click Button.
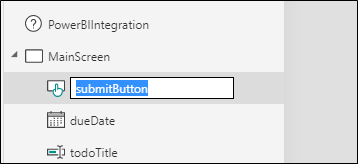
- Rename the button submitButton.
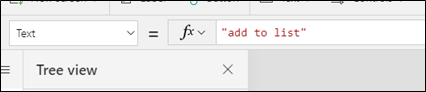
- Change the Text of the submitButton to add to list.
- Set the OnSelect value of the submitButton to the formula below. This formula will add to-do item to the Tasks folder, set the title of the to-do item to the text in the todoTile input control, and set the due date to the date selected from the dueDate control.
‘MicrosoftTo-Do(Business)’.CreateToDo(todoTitle.Text, {folderId: “Tasks”, DueDateTime:{ DateTime:dueDate.SelectedDate, TimeZone:’UTC’ }})
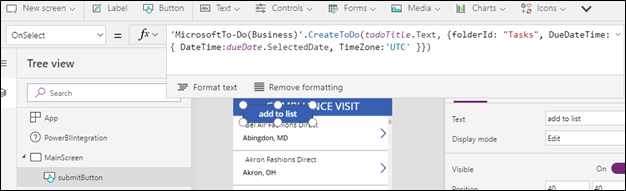
- Move the submitButton below the dueDateControl and resize it.
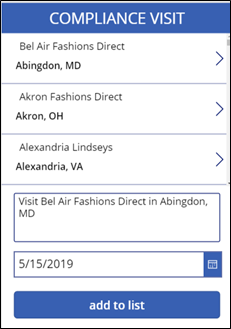
- Your MainScreen should look like the image below.
- Click File and click Save.
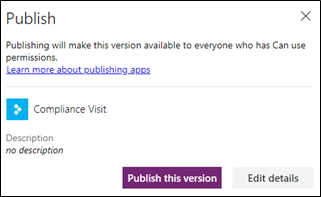
- Click Publish.
- Click Publish this Version.
Task 2: Test Application.
- Go back to Power BI.
- Resize and reposition all the visuals until the report looks like the image below.
- Click Save.
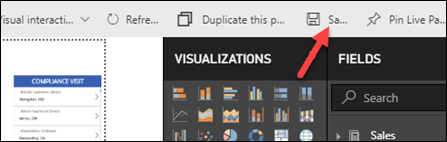
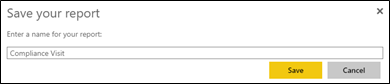
- Enter Compliance Visit for Name and click Save.
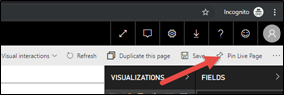
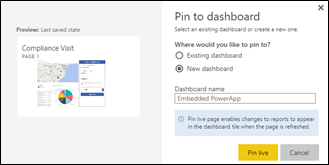
- Select Pin Live Page.
- Select New Dashboard, enter Embedded PowerApp and click Pin Live.
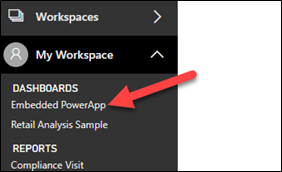
- Go to the Dashboards section and select Embedded PowerApps dashboard.
- Your dashboard should load.
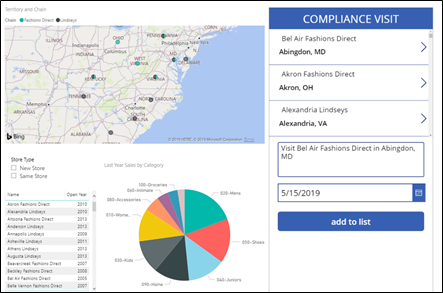
- Go to the map, zoom in, and select Virginia. All the visuals should update including the PowerApp.
- Select Colonial Heights Lindseys from the PowerApp list. The input text value should get updated.
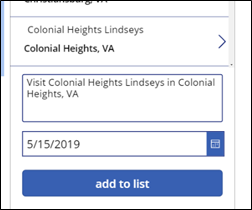
- Select future date for due date and click add to list.
- The item should be added to your to-do list.
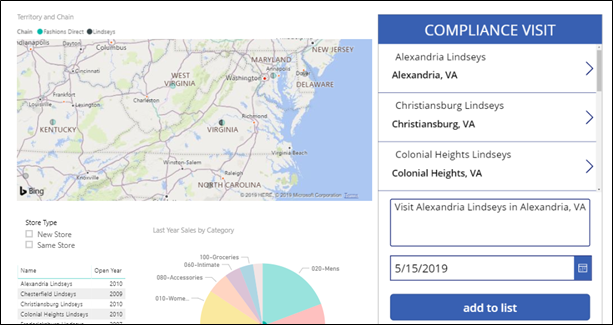
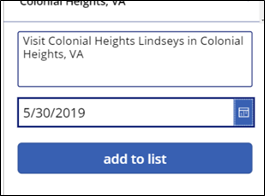
- Select Tennessee from the map.
- Select Cookeville Lindseys from the PowerApp, select future date for due date and click add to list.
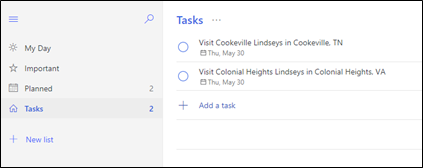
- Go to https://to-do.office.com and login.
- Select the Tasks list. You should see the items you added by the embedded PowerApp.
Bonus: Go back and edit the canvas app you have made to give the user a message to confirm submission of the to-do item
 Amik
on:
Dynamically translate dropdown options based on a ...
Amik
on:
Dynamically translate dropdown options based on a ...
 ManishM
on:
How do you bulk download attachment files from a D...
ManishM
on:
How do you bulk download attachment files from a D...
 on:
What you should know when recruiting for a Power P...
on:
What you should know when recruiting for a Power P...
 on:
Introduction of AI Builder in Power Automate: How ...
on:
Introduction of AI Builder in Power Automate: How ...