Teams are rapidly replacing traditional SharePoint workspaces. If and when this happens, we need a tool for end-users to order different teams for different purposes.
Fortunately, Microsoft Graph has plenty of useful APIs for managing Teams. In this blog post we build simple Teams provisioning solution using:
- PowerApps
- SharePoint
- Flow
- Microsoft Graph
In our solution:
- The user can subscribe to either a project team or "regular" team (= we have two Teams template)
- The user will be also the owner of the new team
- The user may nominate other team owners and members when placing the request
- If the user requests a private team, she/he must justify why this team has to be private (our example organization wants all communication to be transparent)
- Private teams will be manually approved/rejected before they are created. Public teams are automatically created
And all of this without writing a single line of code!
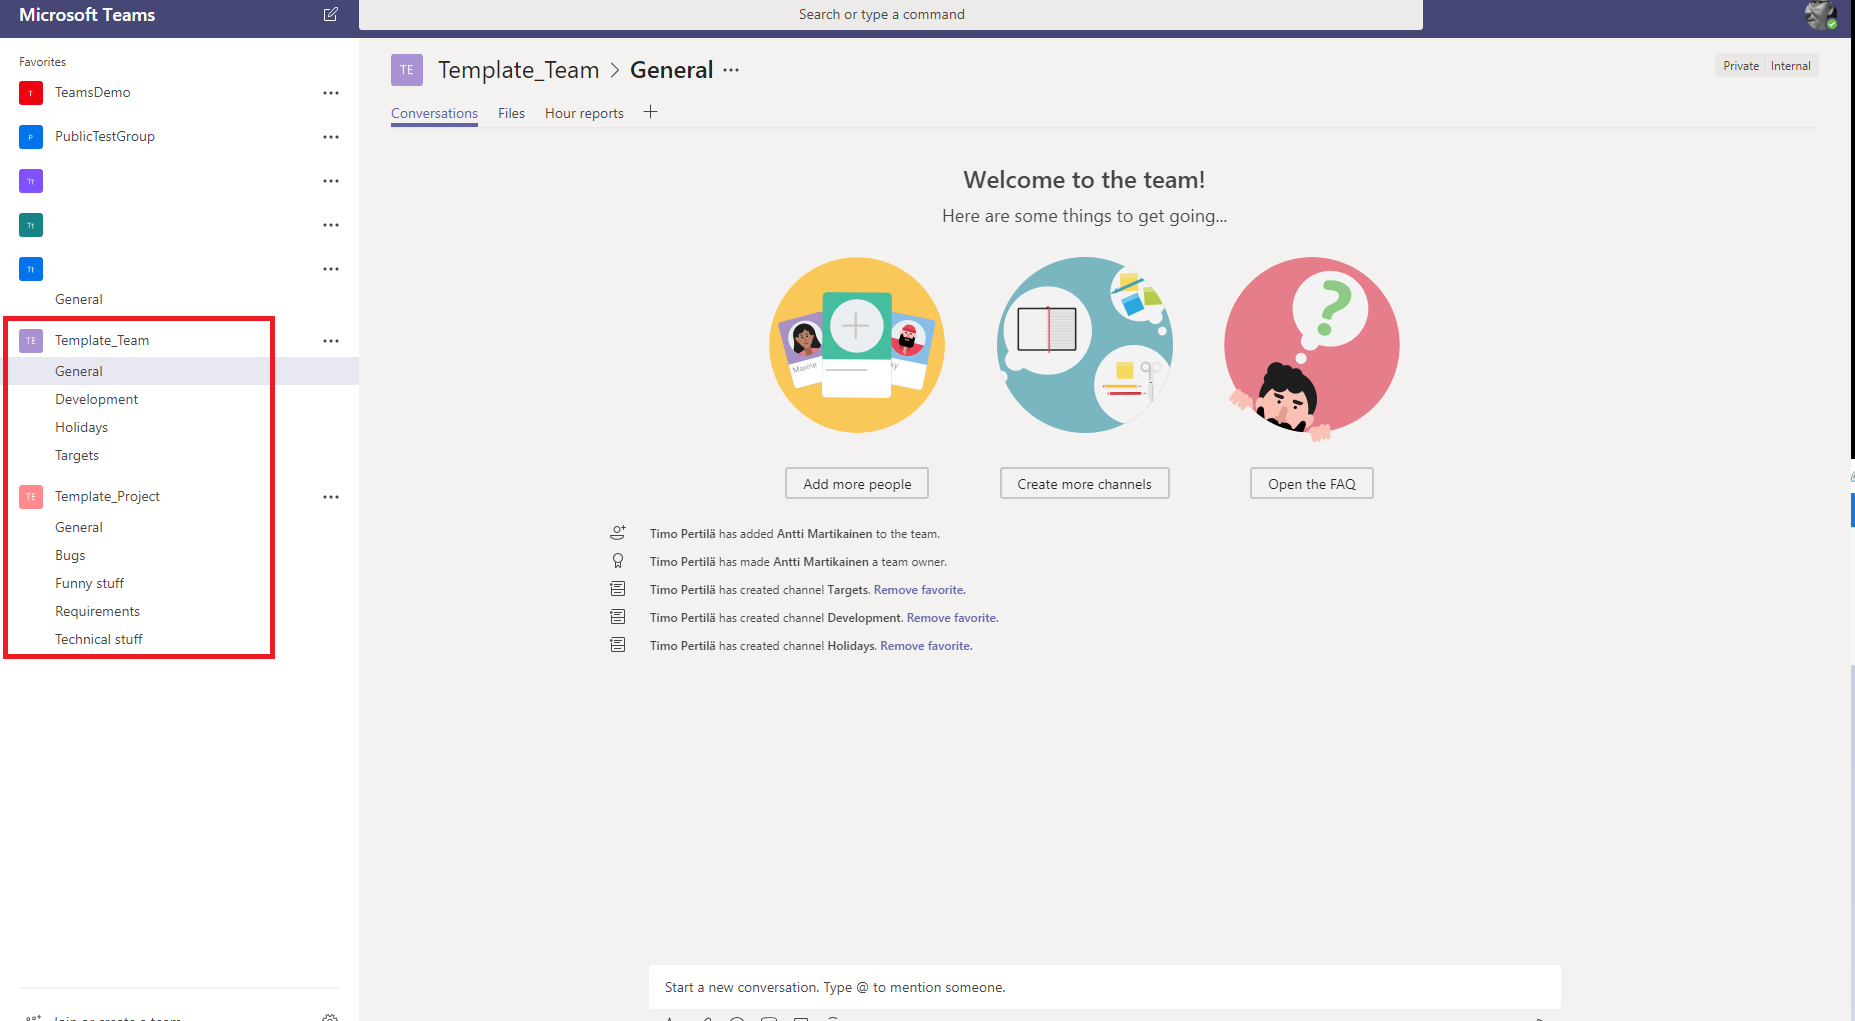
Step 1 - Creating templates
We create two new teams (Template_Team and Template_Project) which will act as templates. Let's make the following changes to them.
- Add typical channels
- Delete Wiki site link for each channel (I just don't like them)
When we clone an existing team, we can pick (in REST API call) which part of the source team will be copied to the new team. Choices are
- members
- tabs
- apps
- settings
- channels
Template owners are always copied to a new team. Don't be worried, they can be automatically removed during the process.
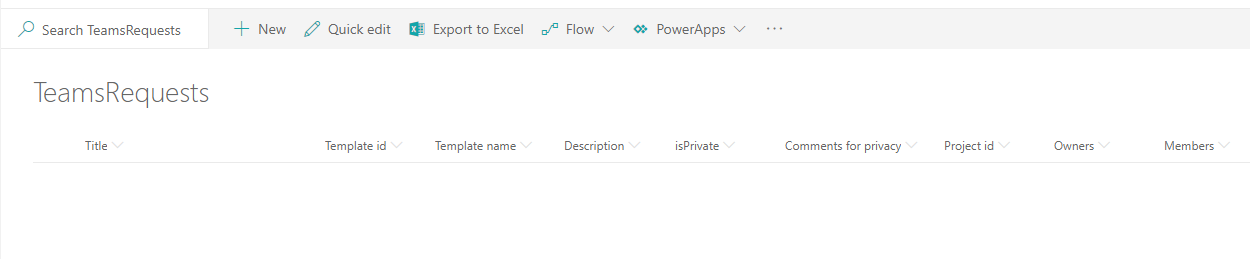
Step 2 - SharePoint list for the requests
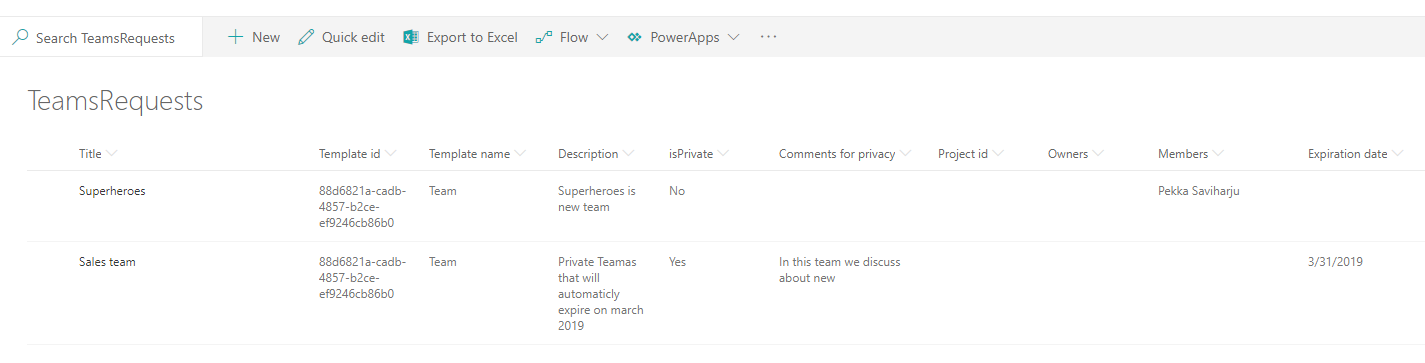
We need a place where to store all team requests. SharePoint list is an excellent choice for that. Let's create a one with the following columns.
- Title (name of the team)
- Template id
- Template name
- Description
- isPrivate
- Comments for privacy (why this team should be private)
- Owners
- Members
- Status
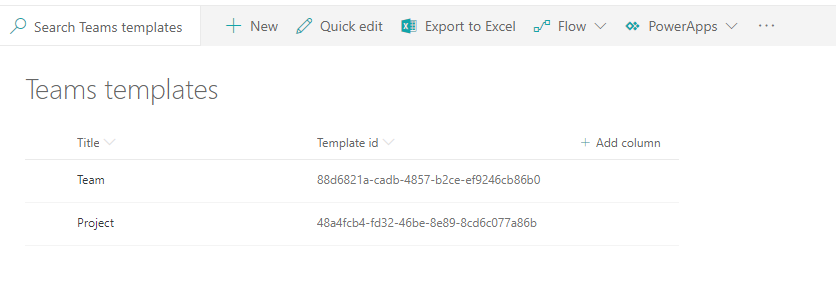
We need also another list having information about used team templates (name and id).
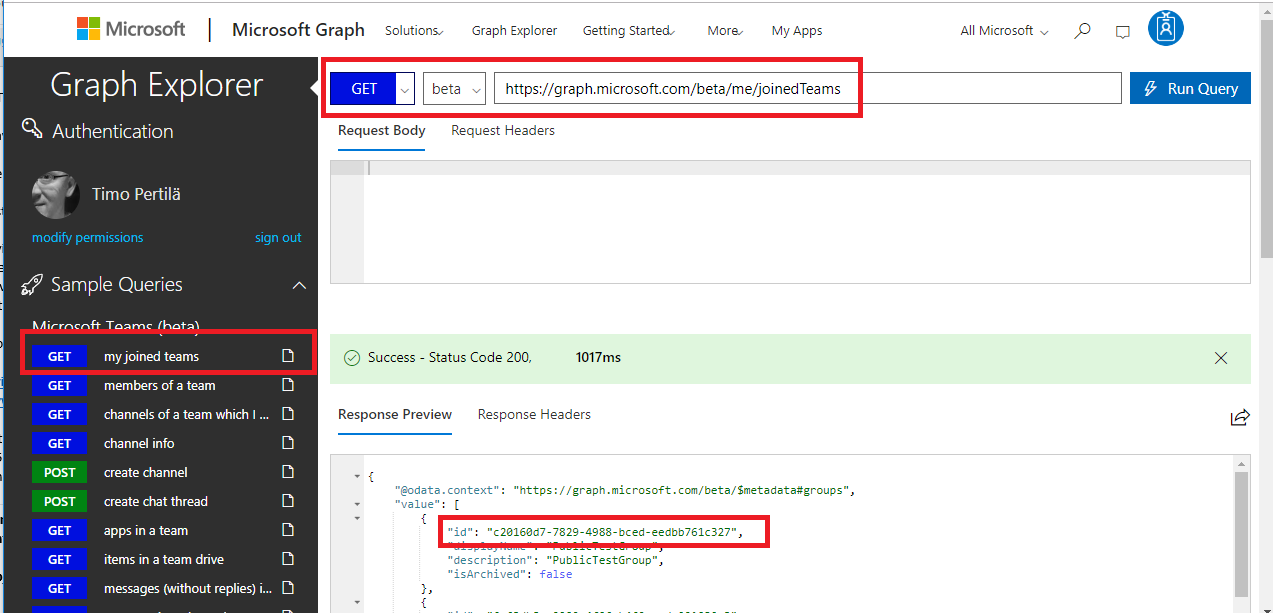
Wait a minute, where i can find those team id's?
You can always use Microsoft's excellent Graph Explorer. Sign in with your account and execute joined teamsquery. From the response, you find all the teams you have been joined (also those two templates we just created).
From there you can find also that team id we are looking for.
Step 3 - Order form (PowerApps)
How end users start the provisioning process? With PowerApps of course!
Just create an empty PowerApps and add the form on it. Attach the form to the SharePoint list we just created. After quick restructuring, our PowerApps looks like this.
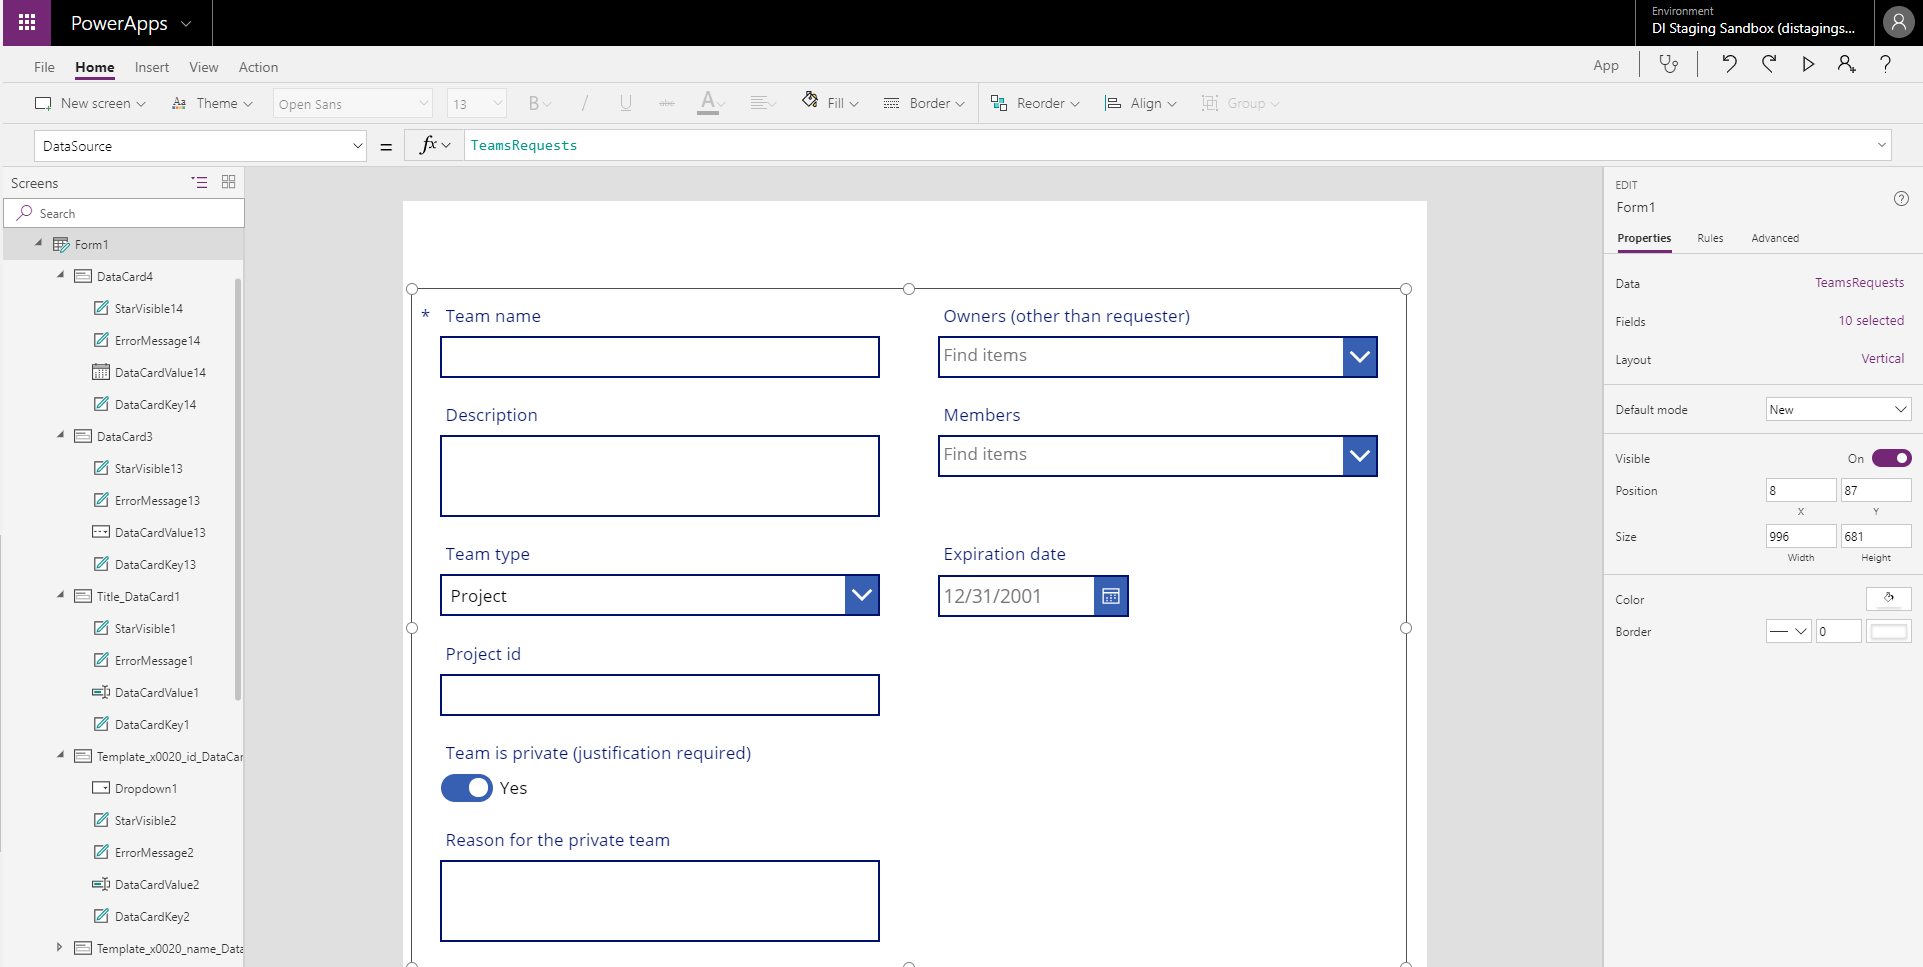
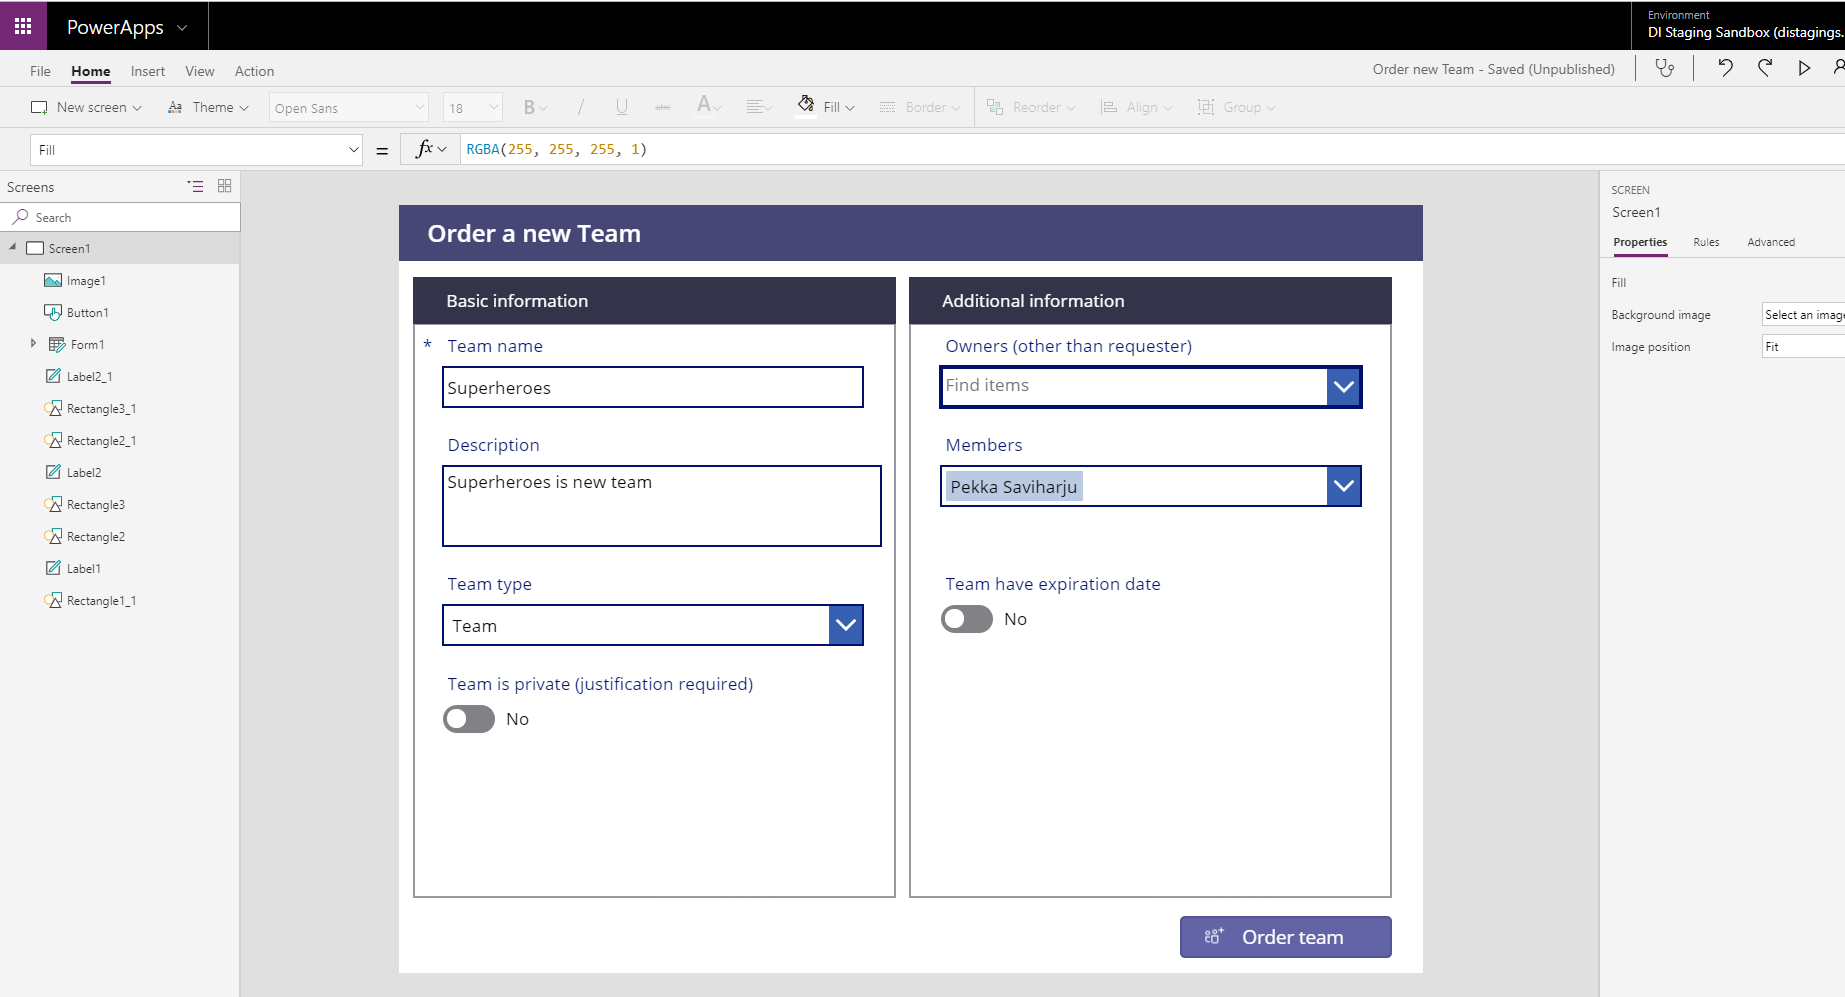
I skip the details (this is not a PowerApps community) but after a few minutes of cleaning and building some logic to the form fields PowerApps looks like this.
If you are not familiar with PowerApps, don't stop here. You can skip PowerApps part and start with manually entering requests on the SharePoint list.
Let's make a few requests with PowerApps.
Seems to be working. Now we can start the hard part of this exercise.
Step 4 - Register Azure AD Application
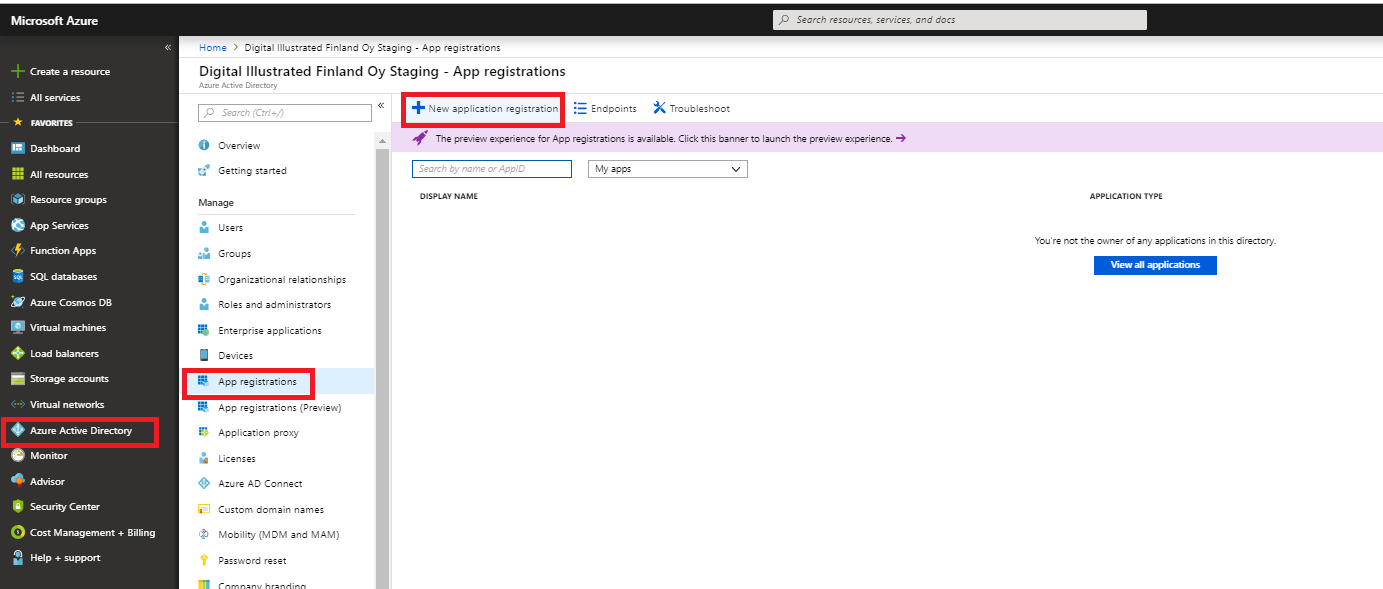
We will use Microsft Graph API in our Flow for creating and updating teams. For that, we have to somehow authenticate our REST API calls. This can be easily done by using Azure AD Application.
First, we need to create a new Application in Azure AD (Azure Active Directory -> App registrations -> New application registration ).
After that we have to require permissions for the Application (Settings -> Required permissions -> Add - > Microsoft Graph).
Just pick the right ones from the list
- Group.ReadWrite.All
- Directory.ReadWrite.All
- User.ReadWrite.All
Names are of course different from those used in the Microsoft documentation (above). No worries, they still can be found there.
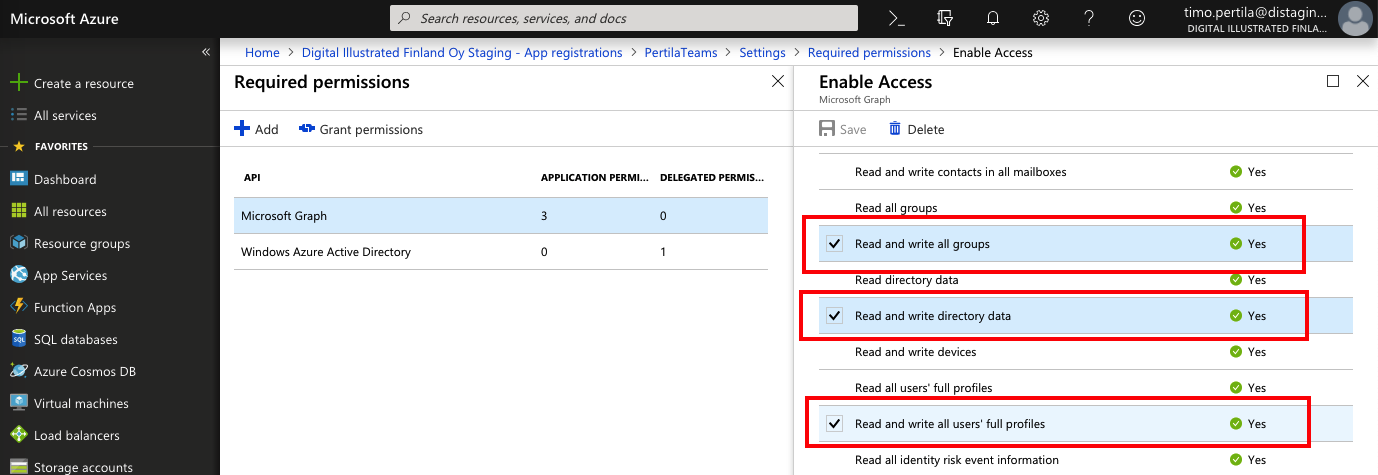
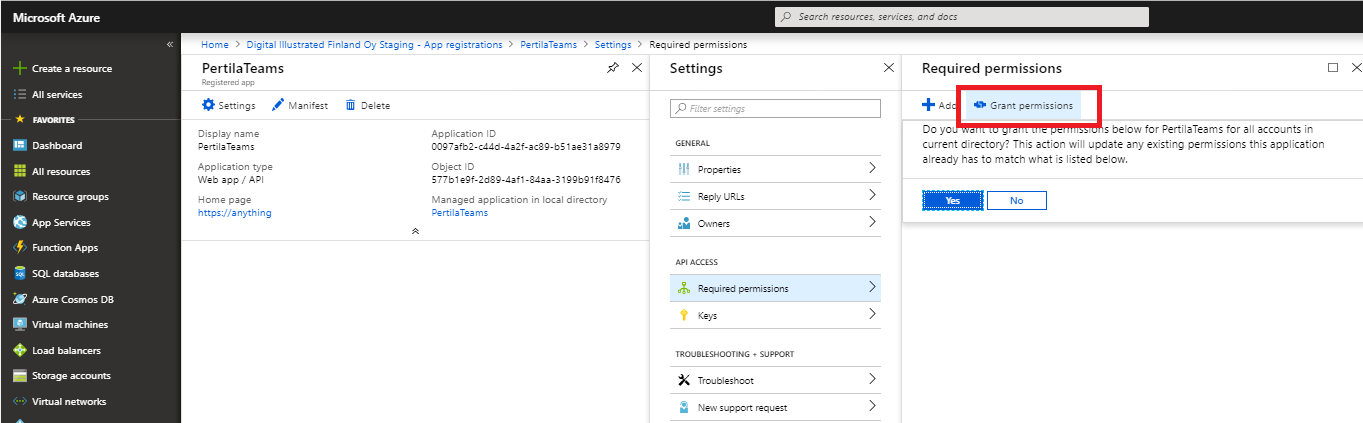
Finally, the Administrator must approve the requested rights. Usually, you can't do this by yourself but we you have to ask an administrator to grant permissions.
This time I can perform self-acceptance.
Then we create a secret. The key of the secret and application id are the pair we use in authenticating.
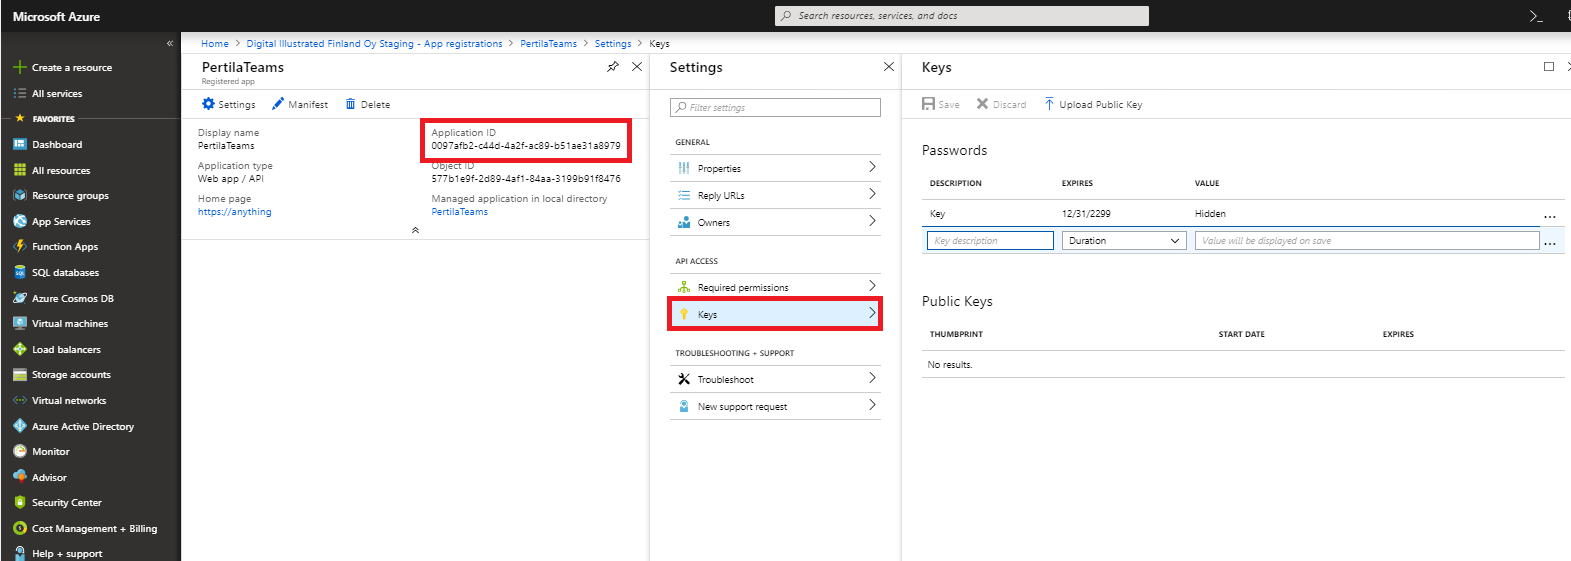
We need also Tenant id. It can be found, for example, in Azure Ad properties (directory id).

Azure AD part is ready. We can move on to build the actual workflow.
Step 5 - Use Flow to create a team
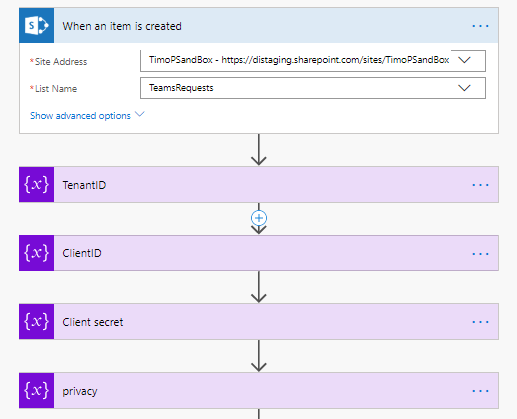
The new team is created with Flow starting every time when a new item is created on our request list.
At the beginning of the workflow, we initialized variables for storing necessary stuff to use Microsoft Graph API
And one extra variable to store the privacy setting of the team. The default value for it is "Public".
Approval of the request (private team)
If the user has requested a private team, we start an approval process.
- Update the request status to "waiting for approval"
- Start the approval workflow
- If the request is rejected
- Send an email about rejection to the requester
- Update the request status to "fail"
- Stop workflow (with Terminate operation)
- Update the team visibility to the private
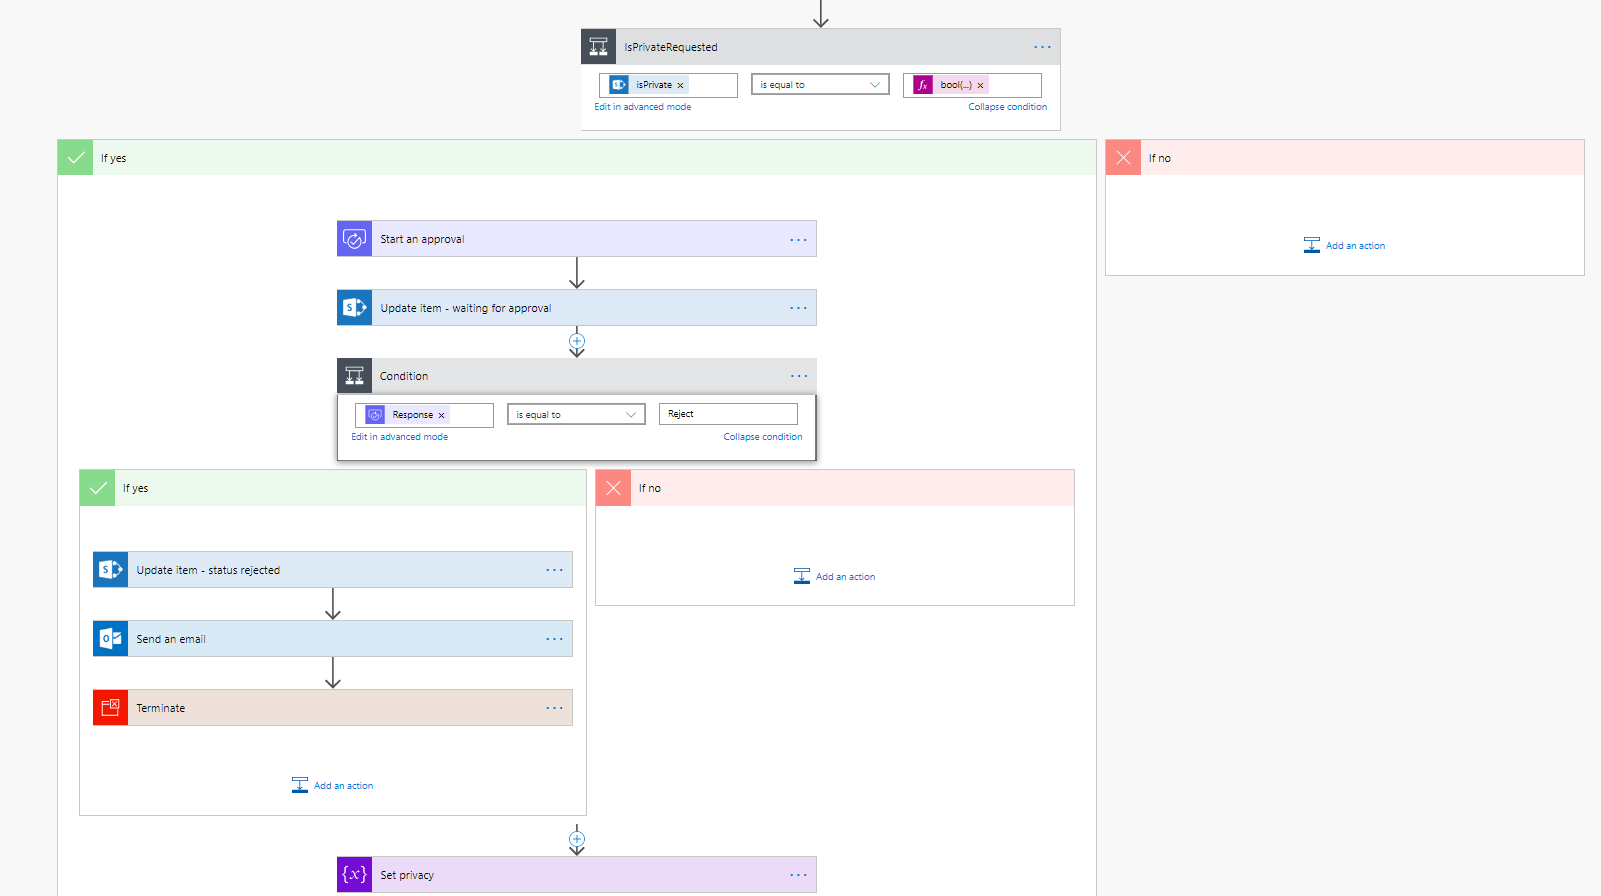
The process above is skipped entirely if the requested team will be public.
Creating a team
Next, we create the requested team. In fact, we create a copy of the matching team template.
This is done in a very simple HTTP call. In the body, there is all needed information in place.
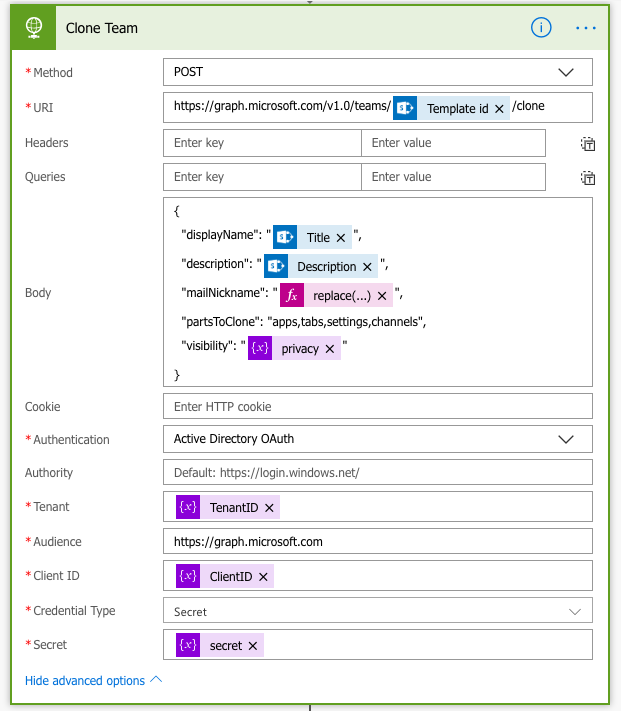
However, the team will be not created immediately. This will cause a little bit more effort because we are not finished yet. The aim is to add more owners and members to the team.
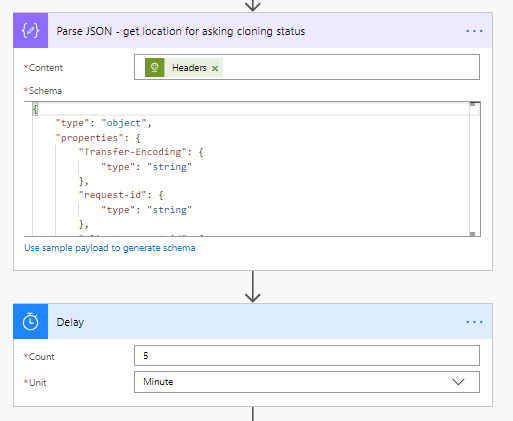
After the REST API call, we add Parse JSON function. It makes easier to handle all the information the REST API call returns.
Among the returned fields we found location. It is URL address from where we can ask whether a team is ready and what GUID it has.
Nex we just wait for 5 minutes before we continue. Actually, we should build a loop for polling team creation status. Maybe next time.
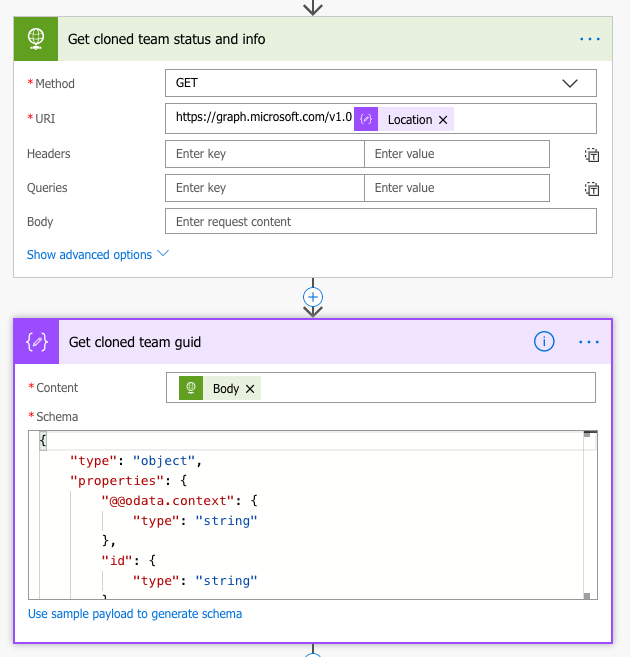
Now the team has been created. Next, we get (with Microsoft Graph and Parse JSON) GUID for the created team.
Adding owners
At last, we can finalize the team we have created.
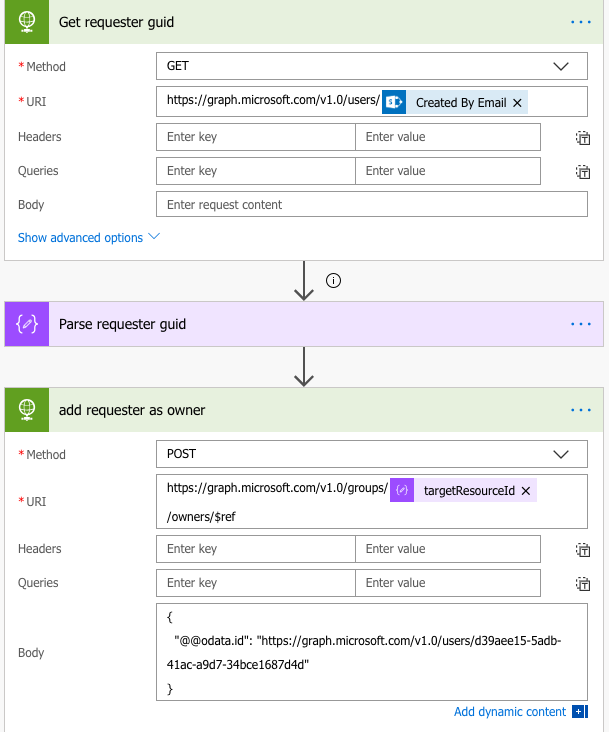
We add requester as an owner for the team. For that, we need the id of requester user account. This is done with Microsoft Graph API (of course). After that, we can add the user to the owners group.
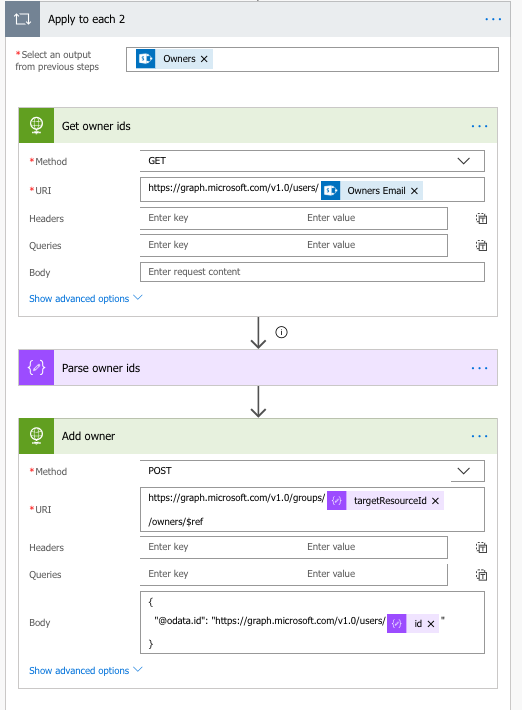
In the same way, we add other owners (requester listed in the request form).
Adding members
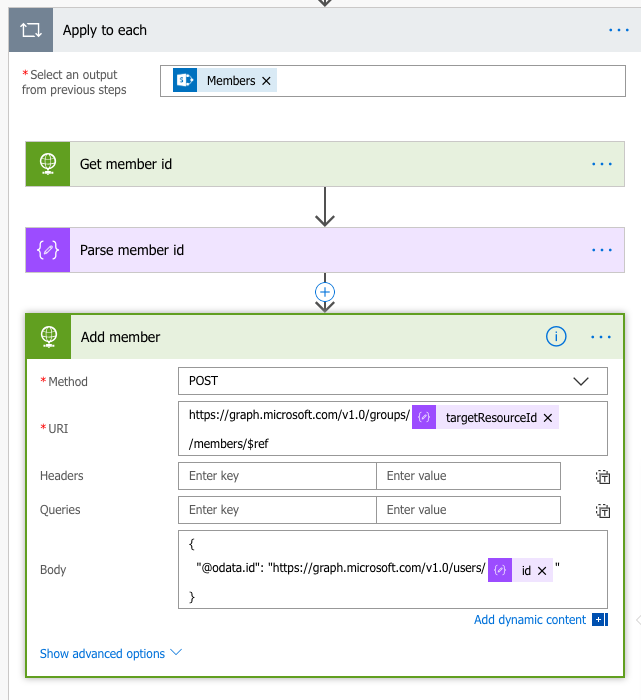
This starts to be a little bit boring. Members (requester listed in the form) are added exactly the same way than owners.
The only small difference is in the URL we use. Word "owners" is replaced with "members".
https://graph.microsoft.com/v1.0/groups/{teamguid}/members/$ref
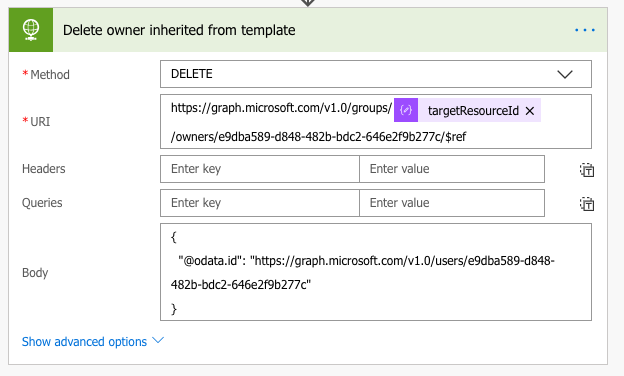
Removal of the (template) original owner
The new team has the same owners than the team where it has been cloned from. We want to remove those ones.
Hardly comes as a surprise that this is done by REST API call to the Microsoft Graph.
Summary
Our solution can be used as a base for the provisioning solution. It can create different teams according to what the user has requested. It also can add owners and members of the created team.
Clone function is pretty handy. It makes easier to understand what templates actually looks like. An alternative way is to build the whole team from the scratch (add channels, change settings, add apps etc) in the Flow.
 trice602
on:
Webpage-to-PDF with Power Automate Desktop!
trice602
on:
Webpage-to-PDF with Power Automate Desktop!
 on:
One Minute Fixes - Can't Call a Flow from a Power ...
on:
One Minute Fixes - Can't Call a Flow from a Power ...
 on:
Interpolated strings with Power Fx in Power Automa...
on:
Interpolated strings with Power Fx in Power Automa...