

Helpful resources

Hear from Principal Program Manager, Dimpi Gandhi, to discover the latest enhancements to the Microsoft #PowerUpProgram, including a new accelerated video-based curriculum crafted with the expertise of Microsoft MVPs, Rory Neary and Charlie Phipps-Bennett. If you’d like to hear what’s coming next, click the link below to sign up today! https://aka.ms/PowerUp
It's time for another TUESDAY TIPS, your weekly connection with the most insightful tips and tricks that empower both newcomers and veterans in the Power Platform Community! Every Tuesday, we bring you a curated selection of the finest advice, distilled from the resources and tools in the Community. Whether you’re a seasoned member or just getting started, Tuesday Tips are the perfect compass guiding you across the dynamic landscape of the Power Platform Community. As our community family expands each week, we revisit our essential tools, tips, and tricks to ensure you’re well-versed in the community’s pulse. Keep an eye on the News & Announcements for your weekly Tuesday Tips—you never know what you may learn! Today's Tip: Community User Groups and YOU Being part of, starting, or leading a User Group can have many great benefits for our community members who want to learn, share, and connect with others who are interested in the Microsoft Power Platform and the low-code revolution. When you are part of a User Group, you discover amazing connections, learn incredible things, and build your skills. Some User Groups work in the virtual space, but many meet in physical locations, meaning you have several options when it comes to building community with people who are learning and growing together! Some of the benefits of our Community User Groups are: Network with like-minded peers and product experts, and get in front of potential employers and clients.Learn from industry experts and influencers and make your own solutions more successful.Access exclusive community space, resources, tools, and support from Microsoft.Collaborate on projects, share best practices, and empower each other. These are just a few of the reasons why our community members love their User Groups. Don't wait. Get involved with (or maybe even start) a User Group today--just follow the tips below to get started.For current or new User Group leaders, all the information you need is here: User Group Leader Get Started GuideOnce you've kicked off your User Group, find the resources you need: Community User Group ExperienceHave questions about our Community User Groups? Let us know! We are here to help you!
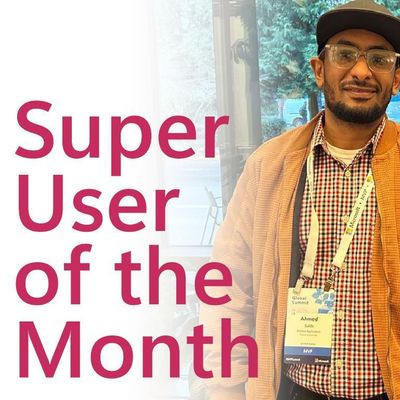
We're thrilled to announce that Ahmed Salih is our Super User of the Month for April 2024. Ahmed has been one of our most active Super Users this year--in fact, he kicked off the year in our Community with this great video reminder of why being a Super User has been so important to him! Ahmed is the Senior Power Platform Architect at Saint Jude's Children's Research Hospital in Memphis. He's been a Super User for two seasons and is also a Microsoft MVP! He's celebrating his 3rd year being active in the Community--and he's received more than 500 kudos while authoring nearly 300 solutions. Ahmed's contributions to the Super User in Training program has been invaluable, with his most recent session with SUIT highlighting an incredible amount of best practices and tips that have helped him achieve his success. Ahmed's infectious enthusiasm and boundless energy are a key reason why so many Community members appreciate how he brings his personality--and expertise--to every interaction. With all the solutions he provides, his willingness to help the Community learn more about Power Platform, and his sheer joy in life, we are pleased to celebrate Ahmed and all his contributions! You can find him in the Community and on LinkedIn. Congratulations, Ahmed--thank you for being a SUPER user!
Welcome to TUESDAY TIPS, your weekly connection with the most insightful tips and tricks that empower both newcomers and veterans in the Power Platform Community! Every Tuesday, we bring you a curated selection of the finest advice, distilled from the resources and tools in the Community. Whether you’re a seasoned member or just getting started, Tuesday Tips are the perfect compass guiding you across the dynamic landscape of the Power Platform Community. As our community family expands each week, we revisit our essential tools, tips, and tricks to ensure you’re well-versed in the community’s pulse. Keep an eye on the News & Announcements for your weekly Tuesday Tips—you never know what you may learn! This Week's Tip: Private Messaging & Macros in Power Apps Community Do you want to enhance your communication in the Community and streamline your interactions? One of the best ways to do this is to ensure you are using Private Messaging--and the ever-handy macros that are available to you as a Community member! Our Knowledge Base article about private messaging and macros is the best place to find out more. Check it out today and discover some key tips and tricks when it comes to messages and macros: Private Messaging: Learn how to enable private messages in your community profile and ensure you’re connected with other community membersMacros Explained: Discover the convenience of macros—prewritten text snippets that save time when posting in forums or sending private messagesCreating Macros: Follow simple steps to create your own macros for efficient communication within the Power Apps CommunityUsage Guide: Understand how to apply macros in posts and private messages, enhancing your interaction with the Community For detailed instructions and more information, visit the full page in your community today:Power Apps: Enabling Private Messaging & How to Use Macros (Power Apps)Power Automate: Enabling Private Messaging & How to Use Macros (Power Automate) Copilot Studio: Enabling Private Messaging &How to Use Macros (Copilot Studio) Power Pages: Enabling Private Messaging & How to Use Macros (Power Pages)

Did you miss the Copilot Studio Coffee Chat on April 4th? This exciting and informative session with Dewain Robinson and Gary Pretty is now available to watch in our Community Galleries! This AMA discussed how Copilot Studio is using the conversational AI-powered technology to aid and assist in the building of chatbots. Dewain is a Principal Program Manager with Copilot Studio. Gary is a Principal Program Manager with Copilot Studio and Conversational AI. Both of them had great insights to share with the community and answered some very interesting questions! As part of our ongoing Coffee Chat AMA series, this engaging session gives the Community the unique opportunity to learn more about the latest Power Platform Copilot plans, where we’ll focus, and gain insight into upcoming features. We’re looking forward to hearing from the community at the next AMA, so hang on to your questions! Watch the recording in the Gallery today: April 4th Copilot Studio Coffee Chat AMA
TUESDAY TIPS are our way of communicating helpful things we've learned or shared that have helped members of the Community. Whether you're just getting started or you're a seasoned pro, Tuesday Tips will help you know where to go, what to look for, and navigate your way through the ever-growing--and ever-changing--world of the Power Platform Community! We cover basics about the Community, provide a few "insider tips" to make your experience even better, and share best practices gleaned from our most active community members and Super Users. With so many new Community members joining us each week, we'll also review a few of our "best practices" so you know just "how" the Community works, so make sure to watch the News & Announcements each week for the latest and greatest Tuesday Tips! This Week: All About Subscriptions & Notifications We don't want you to a miss a thing in the Community! The best way to make sure you know what's going on in the News & Announcements, to blogs you follow, or forums and galleries you're interested in is to subscribe! These subscriptions ensure you receive automated messages about the most recent posts and replies. Even better, there are multiple ways you can subscribe to content and boards in the community! (Please note: if you have created an AAD (Azure Active Directory) account you won't be able to receive e-mail notifications.) Subscribing to a Category When you're looking at the entire category, select from the Options drop down and choose Subscribe. You can then choose to Subscribe to all of the boards or select only the boards you want to receive notifications. When you're satisfied with your choices, click Save. Subscribing to a Topic You can also subscribe to a single topic by clicking Subscribe from the Options drop down menu, while you are viewing the topic or in the General board overview, respectively. Subscribing to a Label Find the labels at the bottom left of a post.From a particular post with a label, click on the label to filter by that label. This opens a window containing a list of posts with the label you have selected. Click Subscribe. Note: You can only subscribe to a label at the board level. If you subscribe to a label named 'Copilot' at board #1, it will not automatically subscribe you to an identically named label at board #2. You will have to subscribe twice, once at each board. Bookmarks Just like you can subscribe to topics and categories, you can also bookmark topics and boards from the same menus! Simply go to the Topic Options drop down menu to bookmark a topic or the Options drop down to bookmark a board. The difference between subscribing and bookmarking is that subscriptions provide you with notifications, whereas bookmarks provide you a static way of easily accessing your favorite boards from the My subscriptions area. Managing & Viewing Your Subscriptions & Bookmarks To manage your subscriptions, click on your avatar and select My subscriptions from the drop-down menu. From the Subscriptions & Notifications tab, you can manage your subscriptions, including your e-mail subscription options, your bookmarks, your notification settings, and your email notification format. You can see a list of all your subscriptions and bookmarks and choose which ones to delete, either individually or in bulk, by checking multiple boxes. A Note on Following Friends on Mobile Adding someone as a friend or selecting Follow in the mobile view does not allow you to subscribe to their activity feed. You will merely be able to see your friends’ biography, other personal information, or online status, and send messages more quickly by choosing who to send the message to from a list, as opposed to having to search by username.